Classic Apple Pie
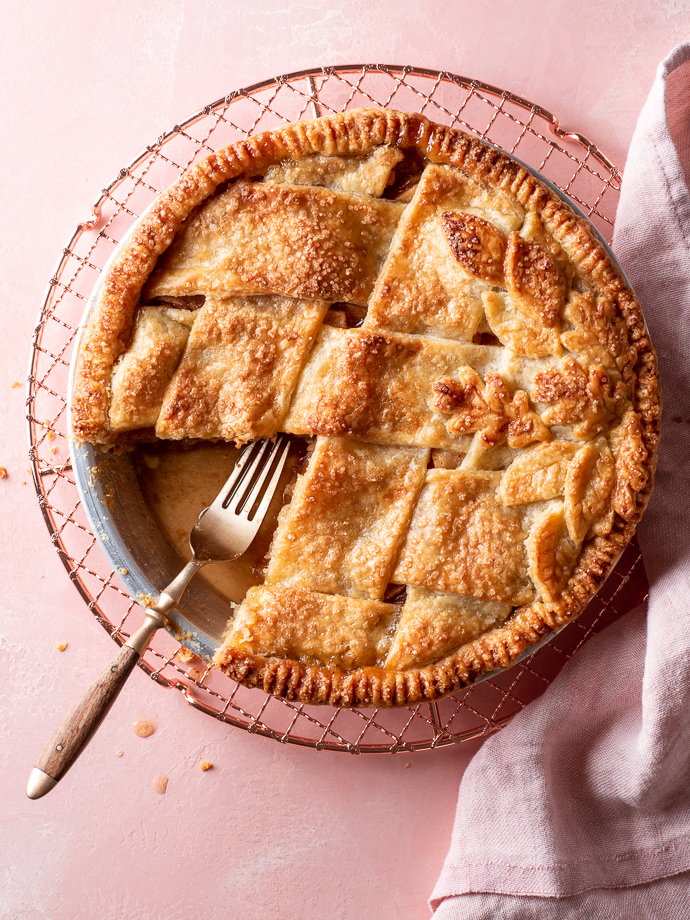
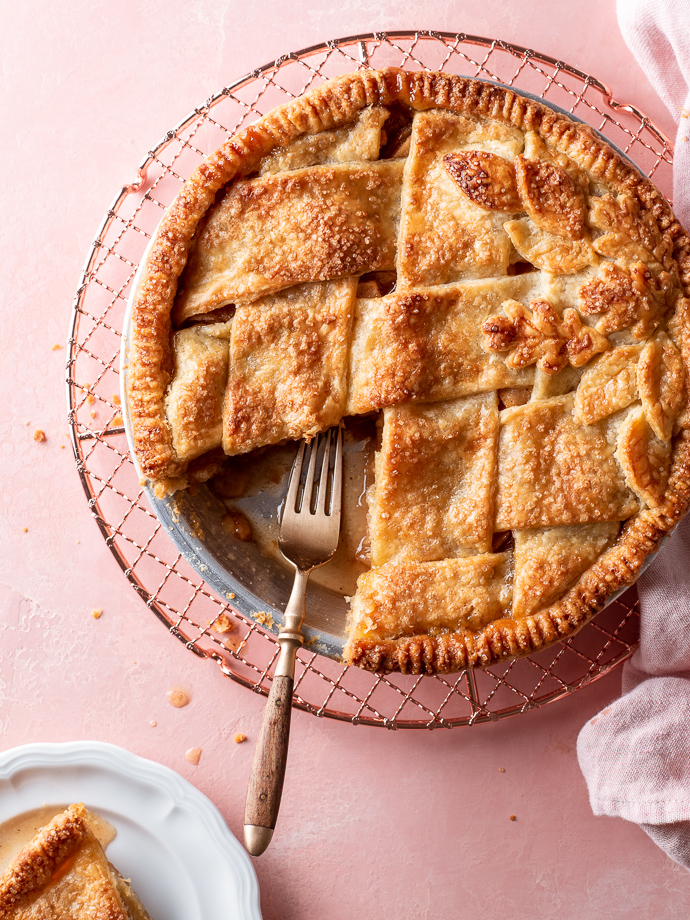
Classic apple pie with a flaky all-butter pastry and decorative lattice crust and a brown sugar, cinnamon-spiced apple filling. An all-time favorite dessert – you’ll want to commit this crowd-pleasing Fall treat to memory!
When it comes to your favorite tried-and-true desserts, which are the recipes you turn to again and again?
For me, apple pie easily breaks the top five. And that’s coming from a girl who’s baking up something sweet most days.
Why we love this classic apple pie
This classic apple pie is a recipe I easily know by heart. The all-butter pastry comes together by feel, the ratios of butter and flour and ice water tattooed over and over again on my memory from years of shaping the humblest of ingredients into perfectly flaky, buttery pastry.
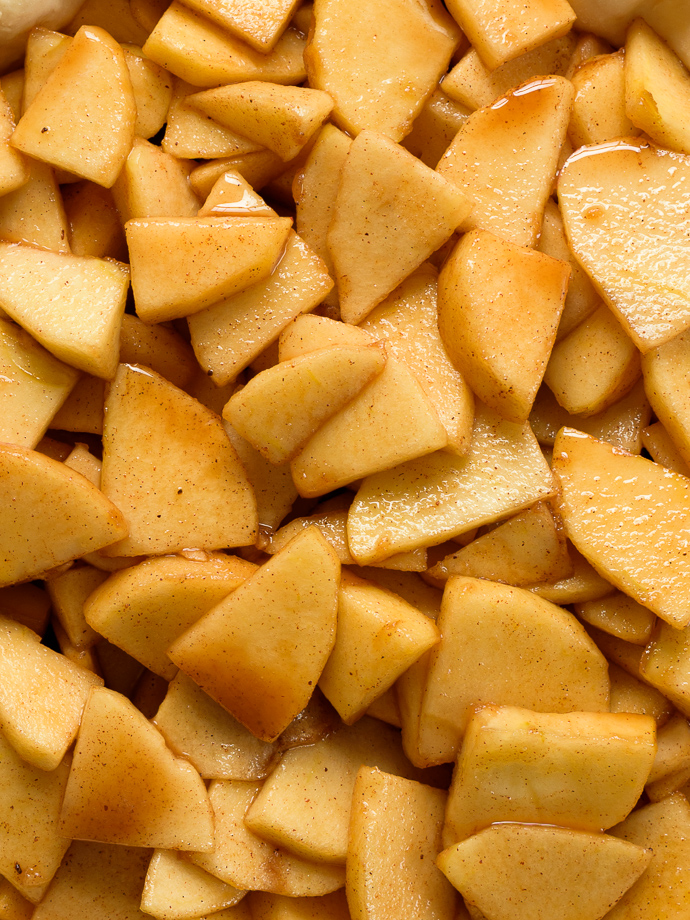
The sweet-tart apple filling, laden with brown sugar, vanilla, cinnamon, cloves, and ginger, can nearly be measured without cups or spoons. A little more or less sugar, maybe a heavier hand with the spice jars, all depending on the sweetness and flavor of the fruit.
And while, like any fruit pie, it takes a bit of time to make, it’s the relaxing sort of methodical work – peeling and slicing apples, rolling out pie dough, tossing together the cozy, aromatic spices, and finally, baking until the juices bubble over the golden crust – that’s good for my baker’s soul.
The ingredients you’ll need for this apple pie
This traditional apple pie is made with mostly pantry staples. Here are the ingredients you’ll need:
- pie pastry: my easy all-butter pie crust is made with flour, sugar, salt, butter, apple cider vinegar, and ice water, and comes together quickly in a food processor. Or, you can also make it by hand with a pastry blender!
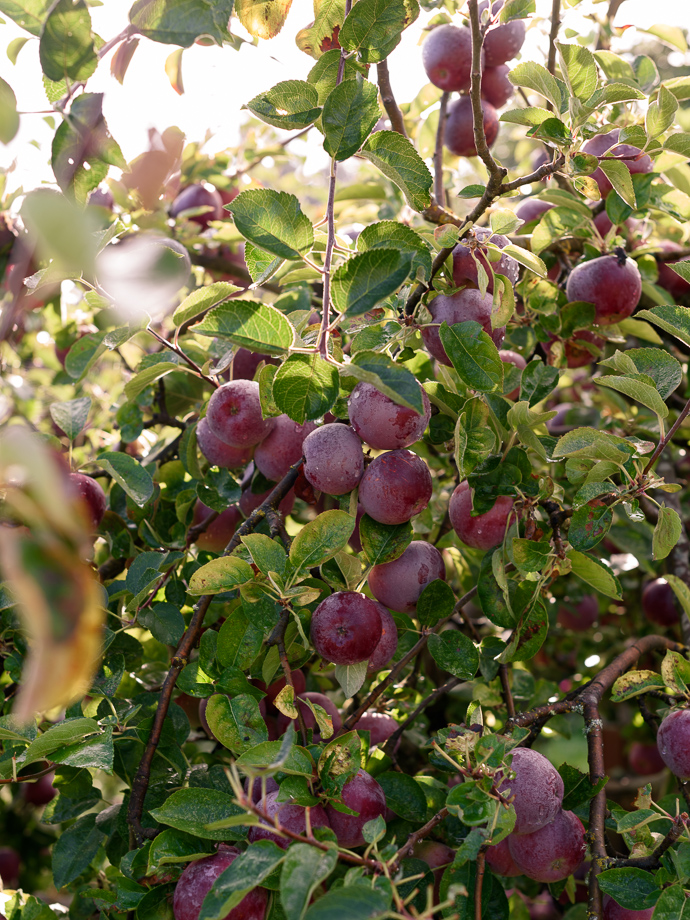
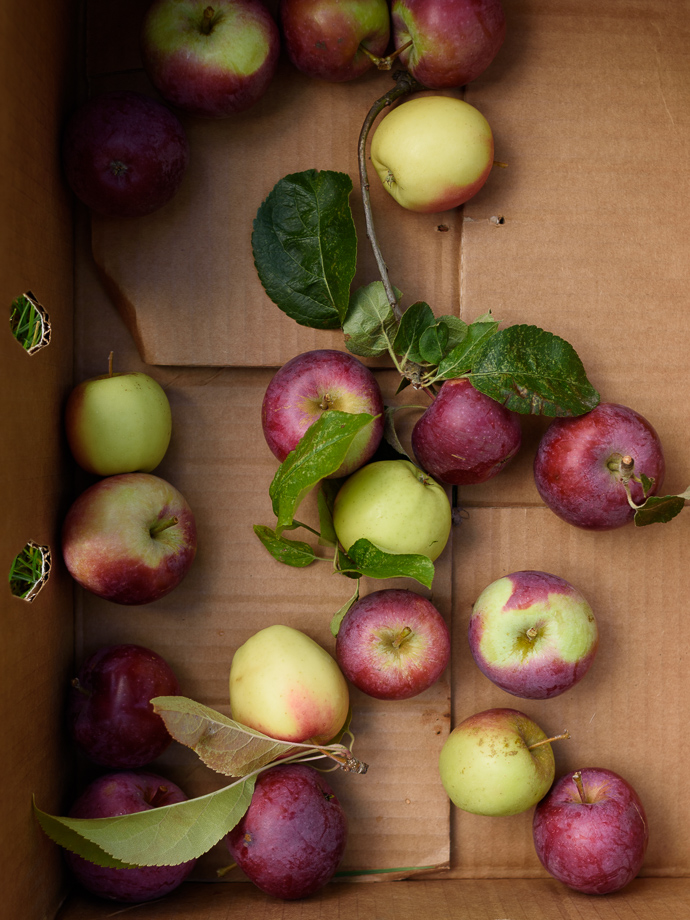
- apples: of course! I like to use a mix of firm, sweet-tart varieties such as Honeycrisp, Pink Lady, Fuji, or Braeburn.
- white and brown sugar: for sweetness and lovely caramel notes.
- arrowroot starch: my pie thickener of choice. The arrowroot starch helps hold the apples together and creates a glossy filling.
- cinnamon, ginger, nutmeg, and cloves: these cozy, warming spices are the perfect complement to the sweet apples.
- salt: to intensify all the other flavors.
- vanilla: just a splash of the the good stuff.
- lemon zest: adds just a hint of brightness and balances the sweetness of the filling.
Find all the exact measurements and full recipe instructions below.
A couple of notes about making pie:
While ceramic pie plates are prettier, I almost always bake pie in inexpensive tempered glass or simple, lightweight aluminum pie pans. They cook more evenly, and will give you tastier and more reliable results than most decorative ceramic pans. Function wins this one!
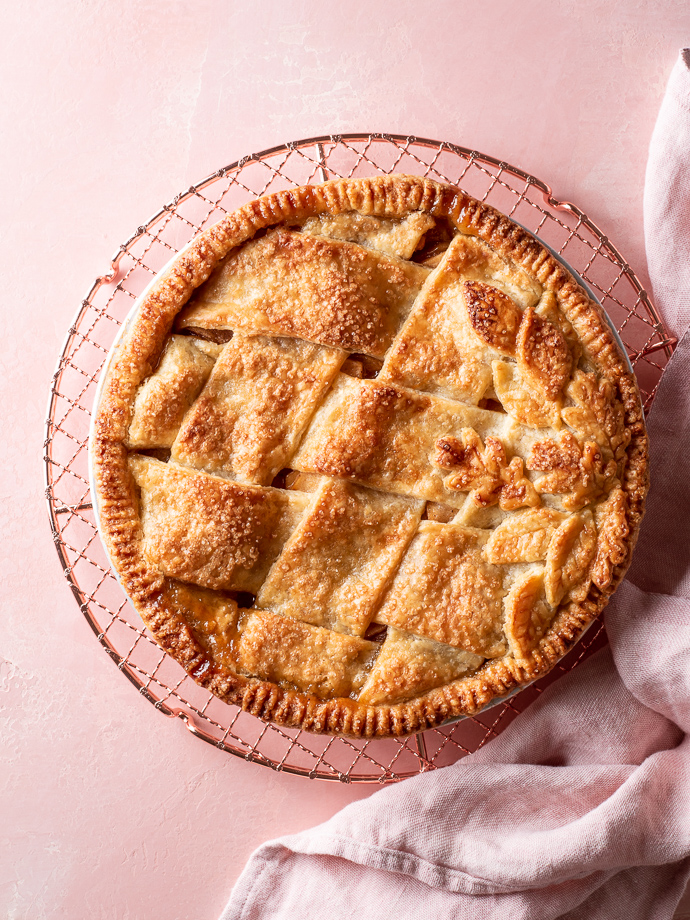
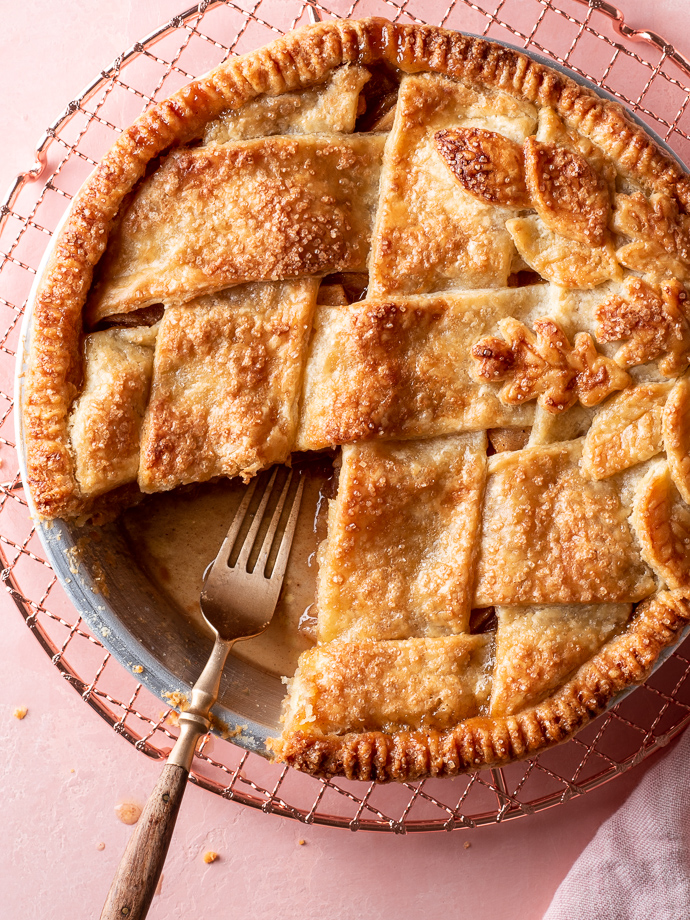
I prefer a high crust to filling ratio, so I always make an extra pie crust to be able to create a really chunky lattice and add some decorative pie crust pieces. You can find the Fall leaf cookie cutters I used here. Following the recipe as written works best for a solid top crust, or a lattice with wider spacing (see here or here).
You can easily freeze this apple pie for later. Simply prepare the pie right up until it’s ready for the oven, then place it on a sheet pan in the freezer. After a couple of hours (or when it’s solid enough to handle), wrap the pie tightly in a few layers of plastic wrap followed by aluminum foil, or place in a plastic storage bag, and freeze until you’re ready to use. Wrapped well, this can be at least 3 months or so.
Then unwrap the pie, let it defrost in the fridge, and bake as you normally would, adding 10-15 minutes to the end of the baking time, as needed. Note: I recommend using a metal pie pan if you’re going this route!
My impatience got the best of me, and I rushed slicing into this apple beauty – and predictably, my slices fell apart. If clean, sturdy slices are important to you, don’t be like me. Resist the urge to dive in, be patient, and wait until the pie is fully cooled and set before cutting into it. You’ll be rewarded with wonderfully layered slices of pie that hold together beautifully.
That being said, even an inglorious heap of warm broken pie crust and syrupy apple filling is arguably still perfection in its own right. Happy baking!!
Other easy and delicious apple recipes to bake right now:
- Easy apple hand pies
- Baked apple donuts (vegan)
- Apple cider cinnamon rolls
- Cinnamon streusel apple muffins
- Caramel apple crumble bars
If you make this classic apple pie, be sure to tag me on Instagram with the hashtag #forkknifeswoon and leave a comment and rating below letting me know how you liked it! ★★★★★ Star ratings are especially helpful because they help others find my recipes too. xo, Laura
Print
Classic Apple Pie
- Prep Time: 45 mins
- Cook Time: 60 mins
- Total Time: 1 hour 45 minutes
- Yield: One 9-inch pie 1x
- Category: Baking, Dessert
- Method: Baking
- Cuisine: French, American
- Diet: Vegetarian
Description
Classic apple pie with a flaky all-butter lattice crust and a brown sugar, cinnamon-spiced apple filling. An all-time favorite, you’ll want to commit this crowd-pleasing Fall treat to memory.
Ingredients
for the all-butter pie crust: ¹
- 1 cup (2 sticks) unsalted butter, very cold
- 2–1/2 cups all-purpose flour, spooned and leveled
- 2 Tbsp granulated sugar
- 1 tsp Kosher salt
- 1 Tbsp apple cider vinegar
- 7–10 Tbsp ice water
for the classic apple pie filling:
- 6–7 medium apples, peeled, cored, and sliced ²
- 3/4 cup dark brown sugar, packed
- 1/4 cup granulated sugar
- 2 Tbsp arrowroot starch ³
- 1–1/2 tsp ground cinnamon
- 1/2 tsp ground ginger
- 1/4 tsp ground cloves
- 1/4 tsp ground nutmeg
- 1/2 tsp Kosher salt
- 1 tsp pure vanilla extract
- 1 tsp fresh lemon zest
- optional: egg wash (1 large egg plus 1 Tbsp whole milk or cream)
- optional: Demerara sugar, for topping
Instructions
Prepare the all-butter pie crust:
- Cut the butter into quarter-inch cubes. Place the butter in the freezer for at least ten minutes or until ready to use.
- Pulse together the flour, sugar, and salt in a food processor, once or twice until just combined. Add the butter cubes to the flour mixture and pulse a few times until the butter is evenly distributed, with the largest butter bits about the size of large peas.
- Add the vinegar and ice water, pulsing once or twice between each tablespoon addition. The dough is ready when it appears crumbly, but will easily hold together when pinched between two fingers. It’s better to err on the side of a slightly wetter dough than too dry – you can always add a bit more flour when you’re rolling.
- Turn the dough out onto a clean, lightly floured work surface and divide into two halves. Form each half into a round disk, working quickly and being careful not to over-handle the dough.
- Wrap each disk tightly in plastic wrap. Refrigerate the dough for at least 30 minutes prior to rolling it out. The pastry may be made in advance and stored for up to a day in the refrigerator or – if wrapped very tightly in plastic wrap – about a month in the freezer.
How to make your classic apple pie:
- Prepare the bottom crust: Remove one disk of dough from the fridge. Wait about 5 minutes for the dough to warm slightly and become pliable. Meanwhile, generously butter the pie pan. Set aside.
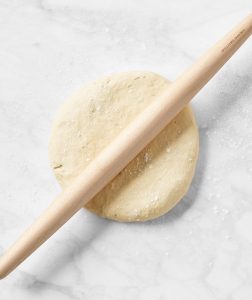
- Place the dough in the center of a clean, lightly floured work surface. Using a rolling pin – I prefer to use a French (tapered) rolling pin – start in the center of the disk, and roll outwards, with firm but gentle pressure. Turn the dough and continue rolling towards the edges. As you work, don’t be afraid to sprinkle additional flour on top of the dough and underneath, as well as on the rolling pin to avoid sticking.
- Continue rolling until the dough is about 2-inches larger in diameter than your pie pan and about 1/8-inch thick. As the dough gets larger, be careful to apply even pressure with the rolling pin across the entire surface of the dough.
- Gently transfer the dough to your buttered pie pan, being careful not to pull or tear the dough. Use your fingers to gently fit the dough against the sides and bottom of the pan. Using kitchen shears, trim the overhanging dough, leaving about an inch of excess (from the edge of the pan). Place in the fridge while you prepare the filling.
- Prepare the apple filling: In a large mixing bowl, stir together the brown sugar, sugar, arrowroot starch, cinnamon, ginger, cloves, nutmeg, and cardamom, until combined. Toss with the sliced apples. Drizzle with the vanilla, and zest, if using. Set aside while you roll out the top crust (about 10-15 minutes).
- Prepare the top crust: Roll the second disk of dough out as directed above, to about 10-inches in diameter and 1/8-inch thick. Use a pastry cutter, sharp knife or pizza wheel to cut out 8-10 equal-width strips for a traditional woven lattice top.
- Assemble the pie: Remove the bottom crust from the refrigerator and sprinkle with 1 tsp each sugar and flour. Fill with the apple mixture. Weave your lattice crust across the pie, tuck the ends under, and crimp the edges. Place the pie in the freezer to chill for 10-15 minutes.
- Bake the pie: Preheat the oven to 400℉. Brush the pie pastry with the egg wash, being careful not to drag any of the fruit filling onto the pastry (it will burn). Sprinkle with Demerara sugar (if using).
- Place the pie on a nonstick or parchment paper lined rimmed sheet pan to catch any drips. Bake for 20-25 minutes on the bottom rack of the oven until the crust is beginning to turn golden brown.
- Turn the oven temperature down to 375℉, move the pie to the middle rack, and bake for an additional 30-40 minutes until the filling is bubbly and the pie is golden brown and cooked through. Use a pie crust shield or aluminum foil tent as necessary to prevent the crust from burning.
- Remove the pie from the oven and let sit on a baking rack to cool for at least an hour before slicing. It will take a few hours to completely cool to room-temperature and fully set up.
- Serve warm or at room temperature with big scoops of vanilla ice cream. Will keep for a day at room temperature or 3-4 days in the refrigerator.


Notes
¹ If making a chunkier lattice top with decorative crust elements (as pictured here), you’ll likely need to make a total of three pie crusts – one bottom crust and two top crusts – to have enough pastry to roll out the lattice pieces and stamp out the leaves.
² Look for firm, tart, and crisp varieties such as Honeycrisp, Pink Lady, Braeburn, or a mix. Aim for thin, equal slices for even baking.
³ I’ve tested multiple pie thickeners, and have found that arrowroot starch (a natural plant starch) works the very best. Unlike cornstarch, which can become cloudy and gummy, arrowroot starch creates a smooth, shiny sauce without a noticeably added taste. As a second choice, you can also substitute (blended) instant tapioca pearls. Or, simply don’t worry about it, and enjoy a saucier pie!
Keywords: apple pie, pie, classic, traditional, brown sugar apple pie, all butter crust, lattice pie, fall pie decorations, apple dessert, thanksgiving pie, holiday dessert, fall apples,
I decided to make a pie today. Found your recipe, and I had some apples at home. This was my very first time ever making a pie.
.. and its SO DELICIOUS, I am sad my family is asleep and can’t taste this right away.
I’m saving this recipe, especially the crust was amazing.
★★★★★
Ahh, thank you for trusting me with your first pie! And so happy to hear it was a success. Hope your family loves it too!
This is the absolute best tasting apple pie I’ve ever had. The crust was SOOO perfectly flaky and good. I was a bit skeptical about the spices but it was the perfect combo and the spices were subtle and complimented the apples so well. This will be the only recipe I use from now on. Thank you for sharing your gift of baking/cooking with us.
★★★★★
Thank you so much, Jiehae!! I’m so happy you enjoyed it as much as we do 🙂
This is the prettiest pie, I love that lattice!
Thank you, Laura!! 🙂
This was so delicious!
I made it for the weekend and it’s just about gone.
My lattice top wasn’t nearly as pretty as yours, but the taste more than made up for it.
Such an intoxicating aroma, too!
★★★★★
Thanks so much, Louise!! We devoured this one too 🙂