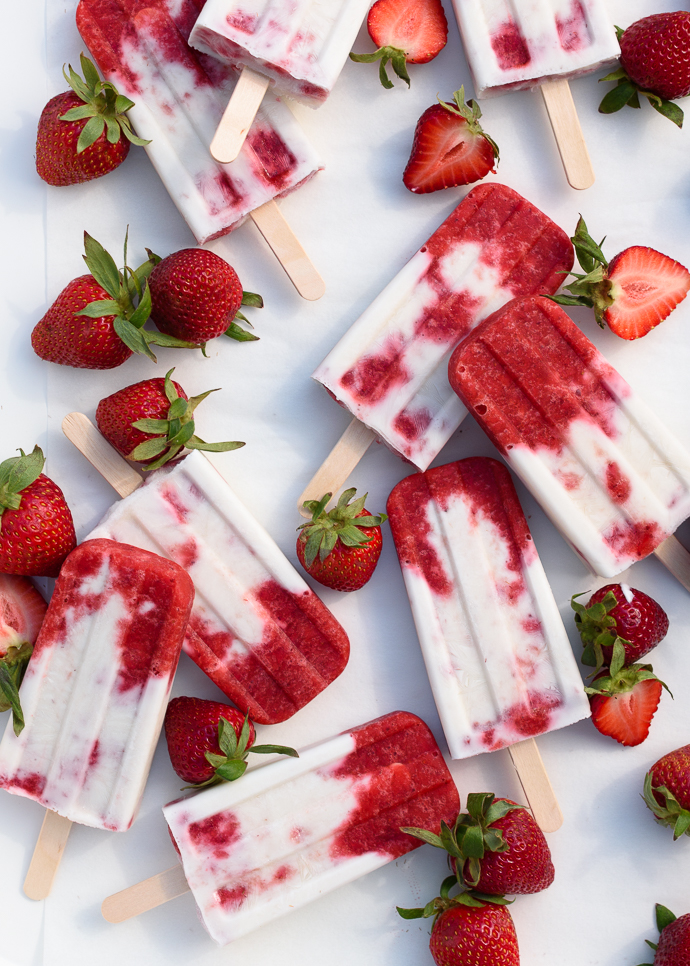
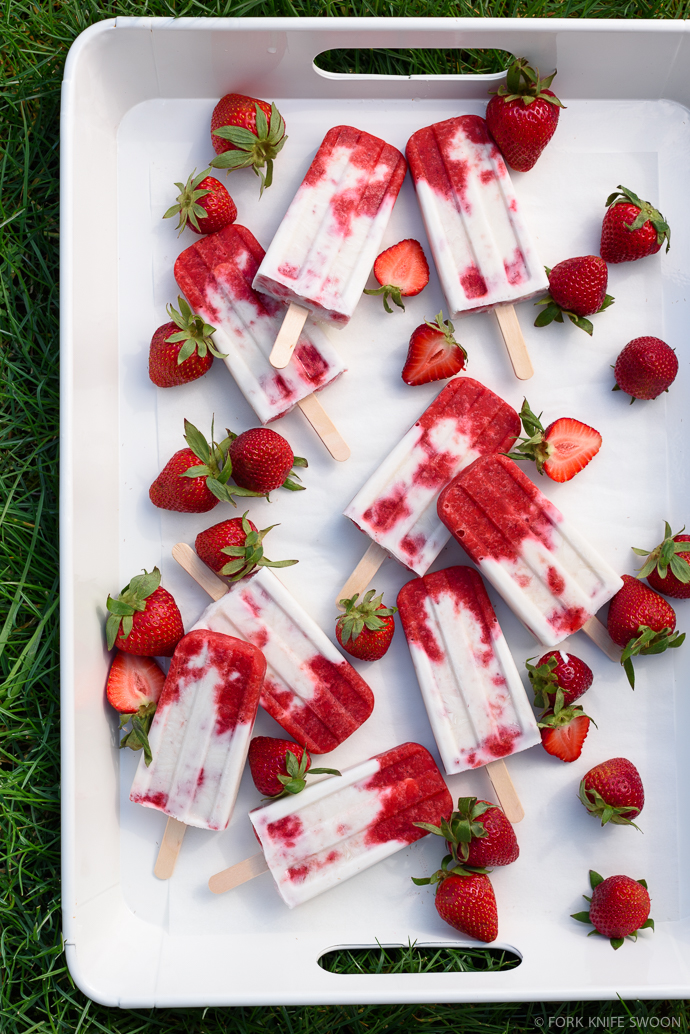
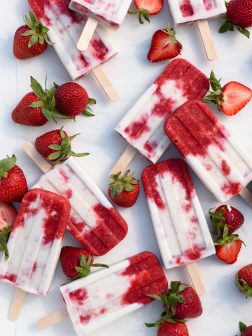
Roasted Strawberries and Cream Popsicles
A delicious, nearly foolproof recipe for strawberries and cream popsicles made with jammy roasted berries, vanilla, and creamy maple-sweetened coconut milk. These strawberry swirl ice pops are a favorite for the whole family, and perfect for spring/summer! Just 5 ingredients, naturally gluten free + vegan, and easily adaptable.
Simple Strawberries and Cream Popsicles
I made these roasted strawberry pops a few mornings ago with the windows open for the first time in what feels like forever. Despite a fairly mild Winter, it felt good to finally fling back the draperies and let some fresh air inside.
Abundant sunshine and an invigorating breeze whisping through the house inspired some Spring cleaning, and I was suddenly tearing my way through a to-do list, armed with the vacuum, scrubbers and dust cloths, purging closets and decluttering, and had loaded up four boxes of giveaway items in no time.
Somewhere in the midst of my crazy cleaning spree, I happened upon the popsicle maker, hiding in a closet since last year, and decided to roast a big heap of berries for some sweet, refreshing strawberries and cream popsicles.
Why You’ll Love These Creamy Strawberry Coconut Pops
These creamy strawberry popsicles are a breeze to make (even with little kids), easily adaptable, and employ a couple of little tricks to make them extra delicious.
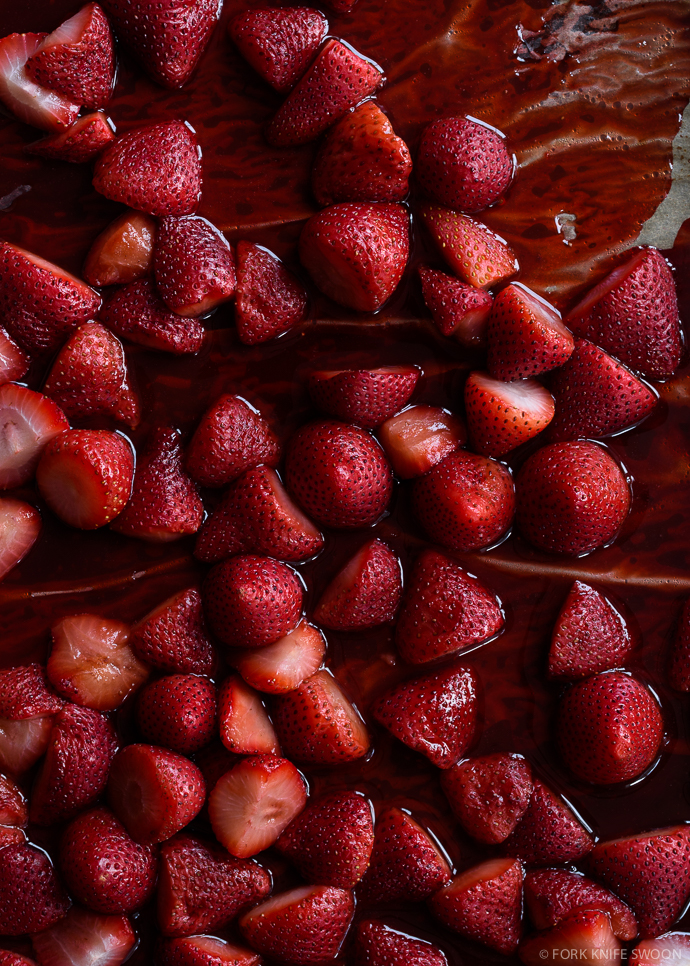
First, roasting the berries caramelizes and concentrates the strawberry flavor, and cooks away some of their natural liquid, reducing iciness in the final pops. I layered the maple-sweetened, roasted strawberries with creamy coconut milk, for vegan, dairy-free popsicles, but you can easily use whatever dairy you have on hand.
Thick Greek yogurt or sweet whipping cream would be great. You can even try buttermilk, which would add a nice, creamy tang to offset the sweetness of the strawberries (and a great way to use up an awkward amount of leftover buttermilk).
Just about any type of berries or fruit can be roasted for these pops – strawberries, raspberries, blueberries, blackberries, peaches, plums… – just pick the sweetest, in-season fruit you can find, and adjust the cooking time as needed.
The hardest part of this whole recipe is not eating all the roasted berries right off the baking pan… not to mention waiting four tortuous hours for these indulgent, fruity popsicles to fully freeze. Unless maybe you’re blessed with more patience and self-control than me? Maybe… Happy Spring!
Ingredients to Make Homemade Strawberry Popsicles
This easy strawberry popsicle recipe comes together easily with just 5-6 simple ingredients. Here’s what you’ll need to make them:
- strawberries: start with fresh, ripe strawberries, the sweeter the better. This is the time for in-season berries to shine!
- maple syrup: for sweetness. Feel free to adjust to your personal taste, and remember that as with all frozen treats, the sweetness will mellow in the freezer.
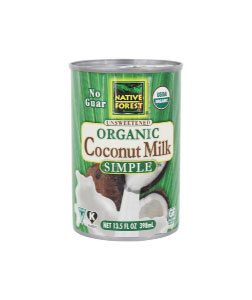
- coconut milk: for those creamy, dreamy swirls, I love to use canned coconut milk. Full fat will give you the best results. You can also opt for yogurt or dairy cream for a richer (non-vegan) version, if you prefer.
- vanilla and sea salt: to enhance the other flavors.
- balsamic vinegar: you may have read to the end of this list, and thought, hmm, that doesn’t belong here! But just a drizzle of good, aged balsamic vinegar adds a subtle, but wonderful depth of flavor. It’s definitely optional but worth trying!
Find all the exact ingredients and measurements in the recipe card, below.
Creamy Strawberry Popsicles FAQs
Nooo, but yes. They’re really so much better if you do!
Fresh strawberries are ideal because we’ll be roasting them first. However, if you choose to skip that step, you can certainly use defrosted frozen berries, just know the texture may be a little bit icier.
Yes! Simply add all of the ingredients to an ice cream maker (be sure the mixture is chilled through first). I would recommend adding a bit of arrowroot starch as well to keep the ice cream nice and creamy.
Other Easy and Delicious Strawberry Recipes That You’ll Love:
- Strawberry jam crumble bars
- Strawberry rhubarb crisp
- A simple strawberry almond tart
- Easy strawberry chia jam (vegan)
- Strawberry basil sodas (vegan)
If you make these strawberries and cream pops, be sure to leave a comment and rating below letting me know how you liked them! ★★★★★ Star ratings are especially helpful because they help others find my recipes too. xo, Laura
Roasted Strawberries and Cream Popsicles
- Prep Time: 20 mins
- Cook Time: 20 mins
- Total Time: 40 mins
- Yield: 10 Popsicles 1x
- Category: Dessert
- Method: Roasting, Freezing
- Cuisine: American
- Diet: Vegan
Description
A delicious, nearly foolproof recipe for strawberries and cream popsicles made with jammy roasted berries, creamy vanilla and maple-sweetened coconut milk. These strawberry swirl ice pops are a favorite for the whole family, and perfect for spring/summer! Just 5 ingredients, naturally gluten free + vegan, and easily adaptable.
Ingredients
- 1 lb strawberries, hulled and halved
- optional: 2-3 tsp good-quality balsamic vinegar
- 1/2 cup pure maple syrup (or honey), divided
- 1–1/2 cups full fat canned coconut milk*
- 1 tsp pure vanilla extract
- small pinch fine sea salt
Instructions
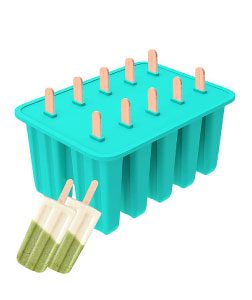
- Preheat the oven to 375℉. Gather your popsicle sticks and mold, and clear a flat space in your freezer.
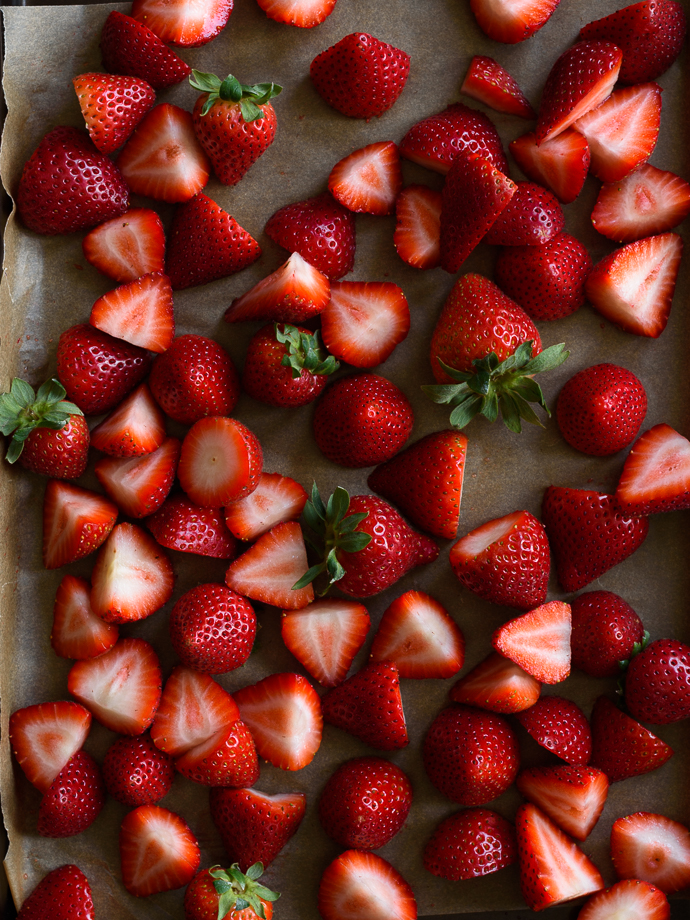
- Arrange the strawberries in an even layer on a parchment paper-lined sheet pan. Drizzle lightly with the balsamic vinegar, if using.
- Roast until the strawberries are soft and fragrant, about 20 minutes. Let cool for 10 minutes on the pan, then transfer to a bowl (including juices) and let cool to room-temperature.
- Add the roasted strawberries and 1/4 cup of maple syrup to a food processor or blender, and pulse or blend a few times to combine. The mixture should still be a bit chunky, with small bites of fruit throughout.
- In a separate medium mixing bowl or measuring cup, whisk together the coconut milk (or dairy of choice) and the remaining 1/4 cup maple syrup, adding more or less sweetener as needed, to taste. Remember that the sweetness will mellow once frozen. Stir in the vanilla and salt.
- For blended popsicles: Add the cream mixture to the food processor/blender and pulse until just combined. Divide between 10 popsicle molds and freeze until set, about 4 hours. After 30 minutes, place a popsicle stick in each pop, and continue freezing.
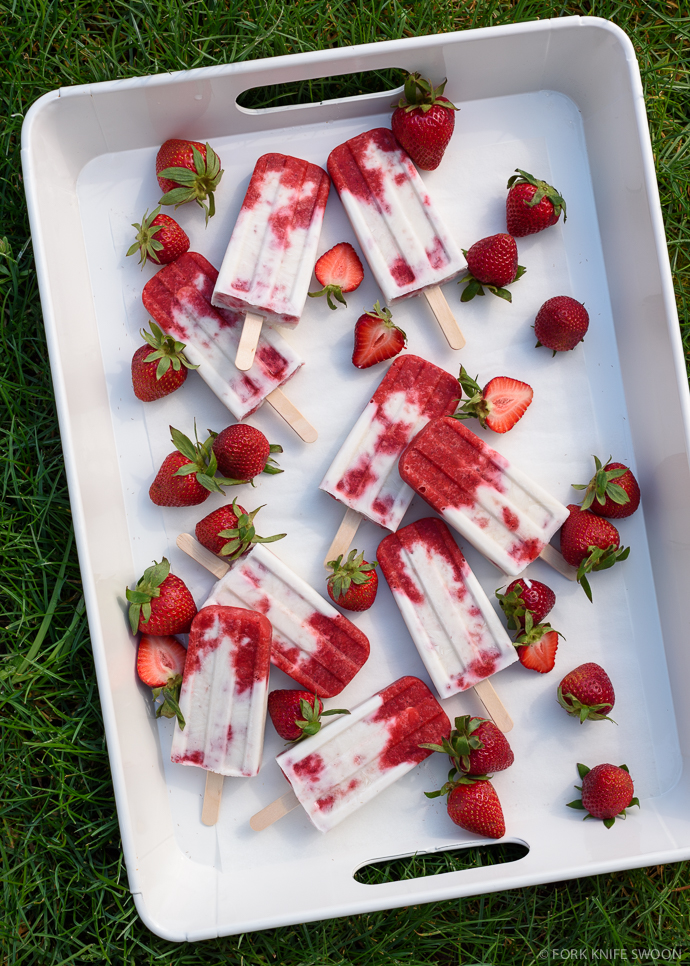
- For layered/swirled popsicles: Spoon a tablespoon or two of the strawberry puree into the bottom of each popsicle mold. Top with a bit of the coconut cream, and continue layering until all the molds are evenly filled. Freeze until set, about 4 hours. After 30 minutes, place a popsicle stick in each pop, and continue freezing.
- To remove the popsicles: Place the popsicle mold in a large pot of warm water for 10-15 seconds, then pull gently on each popsicle stick until the pops release.
Notes
- I prefer to use whole canned coconut milk in this (and most) frozen coconut recipes because it results in a creamier texture that more closely mimics dairy cream. You can certainly use light coconut milk, but it will result in an “icier” textured pop. Look for brands that have just two ingredients: coconut and water, and no added gums or stabilizers such as Golden Star or Native Forest Simple.
- Using coconut milk keeps these pops vegan, but feel free to use whatever dairy you have on hand. Greek yogurt, heavy whipping cream, or buttermilk are all good choices.
Keywords: strawberries and cream popsicles, roasted strawberries, vegan popsicles, strawberry coconut, ice pops, maple, easy
I can’t even count how many times I’ve made these Popsicles. They are absolutely delicious 😋
We love roasting strawberries and peaches (when in season).
Thank you for sharing this great recipe!!
★★★★★
Oh, yay! Thank you so much, Kim!!
I am going to use this as a base for ice cream….just freeze the whole amount and scoop out
Yum! It would work well in an ice cream maker, too. If you go the ice cream route, I would recommend adding a bit of arrowroot starch to keep the texture from getting too icy.
These are amazing!!! I have tried many popsicle recipes from the internet and these are by far my favourite. I am so glad that I found this recipe!
★★★★★
Thanks so much, Karen! That makes my day 🙂
I wonder how this would work with peaches?
Hi Linda! I think peaches would be great – might have to adjust the roasting time a bit? Maybe slice into halves or quarters? I’d love to know how they turn out if you try it! 🙂
Hi Laura, I wanted to let you know what a beautiful recipe you made. I love fruit popsicles and the more colorful the better. Although summer is just about ending this recipe convinced me to make these popsitcles and enjyo a bit longer of the sunny days. Gorgeous picture also. Thanks 🙂
Thank you so much, Silvia! So glad you enjoyed these as much as we do!
These are so gorgeous. I’ve never roasted strawberries in the oven but I will have to try it. I’ll bet these berries would be good with a bowl of vanilla ice cream too. Must get popsicle maker!
Thank you so much, Karen! YES – the roasted strawberries are super yummy over vanilla ice cream, and that’s even easier than these pops!
These look delicious I am going
to make them tomorrow.
Thank you, Eileen! Hope you enjoy!!
Hahaha oh good, I thought I was the only one that always seems to have a crazy amount of buttermilk left over! Love how you roasted the strawberries first, so smart!!! And beautiful photos, as always!
Right?? There’s always like some awkward weird amount left over! Thanks Chris!!
I always have an awkward amount of heavy cream left, so this recipe is perfect! My popsicles are in the freezer now 🙂 I have been trying a bunch of your recipes the past few months, love them! Thanks Laura!
★★★★★
Thanks so much, Amy! So glad you loved these!
These are beautiful, Laura. Roasting the strawberries to concentrate their flavor and adding the balsamic vinegar are both such good ideas that really elevate this recipe. And isn’t it great to see the California strawberries coming into the market? I’ve been buying them frequently.
Thank you so much, Mary!! I feel like I’m cheating with CA strawberries, but they’ve actually been really good lately, and it holds me over until we get some local berries!
Laura I just got to making this today. They are in the freezer, can’t wait to see how they turn out! Tasted the roasted blended strawberry sauce and it’s amazing. It was very easy to roast the strawberries, I’m sure I’ll be doing it again. I am making the swirled variation.
I hope you enjoy, Mary! Let me know! 🙂
They’re great! I put a photo of them (and link) up on my blog. I’m glad to have them in the freezer for this weekend with all the great warm weather we are having!
Roasted strawberries are one of my most favorite things in the whole world. Love how fabulous these pops look!
Me too! Thank you so much, Annalise!
Doesn’t it feel good to finally open the windows. I’m ready for warm weather. These popsicles are stunning. Pinned.
SO ready! Thanks, Jennie!!
Roasted strawberries and balsamic is one of my favorite combinations! Just those two with a pinch of nuts and drizzle of coconut cream is amazing but you went a step further and made these popsicles. This is what dreams are made of!
Me too! It took sooo much will power not to just eat all of the roasted strawberries by themselves. Thanks, Christina!!
Wow! These look so great. My children would love them. Great blog as well. I wish I had discovered it sooner. Love the pictures.
Thanks so much, Adina! Hope you and the kids enjoy!!
These beauties are getting me excited for Summer! Bring on the berries.
Thanks, Nicole! I can’t wait until berry season hits full swing…
Well hello there spring! These look positively luscious. It’s making me crave a popsicle right this moment!
Thank you so much, Courtney!