Description
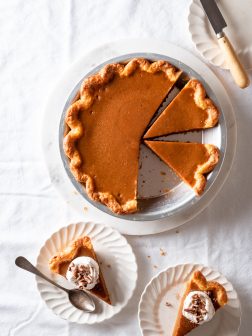
Perfect pumpkin pie. With a flaky, all-butter pie crust and flavorful pumpkin custard filling, this classic pumpkin pie is made all the more delicious with the addition of roasted sugar and warming chai spices. Sure to become a holiday family favorite!
Ingredients
for the all-butter pie crust:
- 1–1/4 cups all-purpose flour
- 1 Tbsp organic cane sugar
- 1/2 tsp kosher salt
- 1/2 cup (1 stick) unsalted butter, very cold
- 1/2 Tbsp apple cider vinegar
- 4–6 Tbsp ice water
- granulated sugar, for blind baking
for the pumpkin filling:
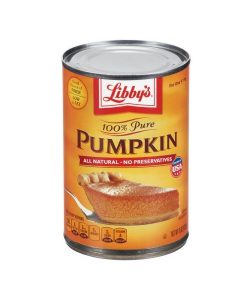
- 1 (15oz) can pumpkin puree ¹
- 2/3 cup roasted sugar ²
- 2 Tbsp light brown sugar, packed
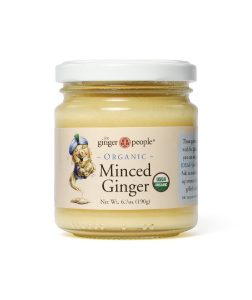
- 1 tsp fresh ginger paste ³
- 1 tsp ground cinnamon
- 1/4 tsp ground cloves
- 1/4 tsp ground nutmeg
- 1/8 tsp ground allspice
- 1/8 tsp black pepper
- 1/8 tsp ground cardamom
- 1 (14oz) can sweetened condensed milk
- 2 large eggs, at room-temperature
- 1 large egg yolk, at room-temperature
- 1 tsp pure vanilla extract
- optional: egg wash (1 large egg plus 1 Tbsp whole milk or cream)
Instructions
for the all-butter pie crust:
- Cut the butter into quarter-inch cubes. Place the butter in the freezer for at least ten minutes or until ready to use.
- Pulse together the flour, sugar, and salt in a food processor, once or twice until just combined. Add the butter cubes to the flour mixture and pulse a few times until the butter is evenly distributed, with the largest butter bits about the size of large peas.
- Add the vinegar and ice water, pulsing once or twice between each tablespoon addition. The dough is ready when it appears crumbly, but will easily hold together when pinched between two fingers. It’s better to err on the side of a slightly wetter dough than too dry – you can always add a bit more flour when you’re rolling.
- Turn the dough out onto a clean, lightly floured work surface and shape into a round disk. Wrap the disk tightly in plastic wrap. Refrigerate the dough for at least 30 minutes prior to rolling it out. Waiting an hour or overnight is best. The pastry may be made in advance and stored a day in the refrigerator or – if wrapped very tightly in plastic wrap – about a month in the freezer.
Prepare the bottom crust:
- Remove your dough from the fridge. Wait about 5-10 minutes for the dough to warm slightly and become pliable.
- Place the dough in the center of a clean, lightly floured work surface. Using a rolling pin – I prefer to use a French (tapered) rolling pin – start in the center of the disk, and roll outwards, with firm but gentle pressure. Turn the dough and continue rolling towards the edges. As you work, don’t be afraid to sprinkle additional flour on top of the dough and underneath, as well as on the rolling pin to avoid sticking.
- Continue rolling until the dough is about 2-inches larger in diameter than your pie pan and about 1/8-inch thick. As the dough gets larger, be careful to apply even pressure with the rolling pin across the entire surface of the dough.
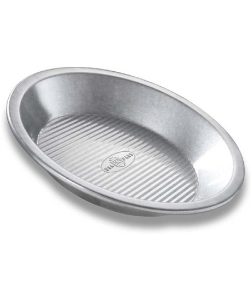
- Gently transfer the dough to your pie pan, being careful not to pull or tear the dough. Use your fingers to gently fit the dough against the sides and bottom of the pan, ensuring there are no air pockets. Using kitchen shears, trim the overhanging dough, leaving about an inch of excess (from the edge of the pan). Crimp the edges in your favorite pattern.
- Place the pie shell in the freezer for 20 minutes until chilled through, or in the refrigerator for at least an hour. It should be cold and firm enough that carefully pressing the aluminum foil into place won’t disturb your pie design.
- Alternatively, once the crust is frozen, wrap tightly in plastic wrap, and store until ready to use, about a month.
When ready to bake
- Preheat the oven to 350℉. Line a sheet pan with parchment paper. Set aside.
- Place the chilled pie crust on the prepared sheet pan and line with a large piece of aluminum foil, carefully and methodically pressing the foil against the bottom and sides of the pastry, and into any nooks and crannies in the design. Be sure all of the crust is covered (this may take two overlapping sheets of foil).
- Fill the foil-covered crust with granulated sugar, all the way up to the top edge. Bake for 50-60 minutes, until the crust is lightly golden and barely cooked through. Remove from the oven, wait until the foil/sugar is cool enough to handle, then transfer your par-baked crust to a wire baking rack to cool until ready to fill.
- Do not discard the roasted sugar. Carefully transfer it to an air-tight container (avoid getting any melted butter in it from the pastry) and use it 1:1 in your favorite baked goods (and in the pumpkin pie filling!).
Meanwhile, make the filling:
- Heat the pumpkin, roasted sugar, brown sugar, ginger, and spices in a large heavy-bottomed pot over medium-heat, until the mixture begins to sputter. Cook for 5 minutes, stirring regularly, until smooth and glossy.
- Remove from the heat and slowly stir in the condensed milk, whisking until completely combined. Whisk in the eggs and egg yolk, one at a time, whisking until completely combined after each addition. Stir in the vanilla.
- Pour the filling into the par-baked pie shell. Lightly brush the crust with an egg wash, if using.
- Bake for 30 minutes at 350℉, until the edges of the filling are just starting to set. Turn the oven down to 325℉, and bake for another 20-30 minutes, until the filling is mostly set (the center will still be slightly jiggly). Cover just the crust with aluminum foil or a pie crust shield, as needed, if the crust starts to brown too quickly. The filling may bubble and puff up slightly as it cooks – that’s okay, it will settle as it cools.
- Remove from the oven and let cool at room-temperature for 2-3 hours until completely set. The pie filling will continue cooking through residual heat.
- Transfer to the refrigerator to chill fully. Garnish with fresh whipped cream and serve chilled or at room-temperature. Best eaten the day of, but will keep for 2-3 days in the refrigerator.
Notes
¹ Canned pumpkin puree is best. I typically use Libby’s. You can also use canned butternut squash puree. If you decide to make your own, I’d suggest using a sugar pumpkin or honeynut butternut squash. Be sure to drain the puree well by placing it in a fine-mesh sieve set over a bowl in the refrigerator for several hours or overnight.
² May be substituted 1:1 with regular granulated or organic cane sugar.
³ If you prefer not to use fresh ginger, substitute 1/2 tsp ground ginger.
Keywords: pumpkin pie, pie, pumpkin, roasted sugar, brown sugar, chai spice, how to use roasted sugar, blind bake with sugar, holiday pie, thanksgiving, best pumpkin pie, perfect pumpkin pie, classic


