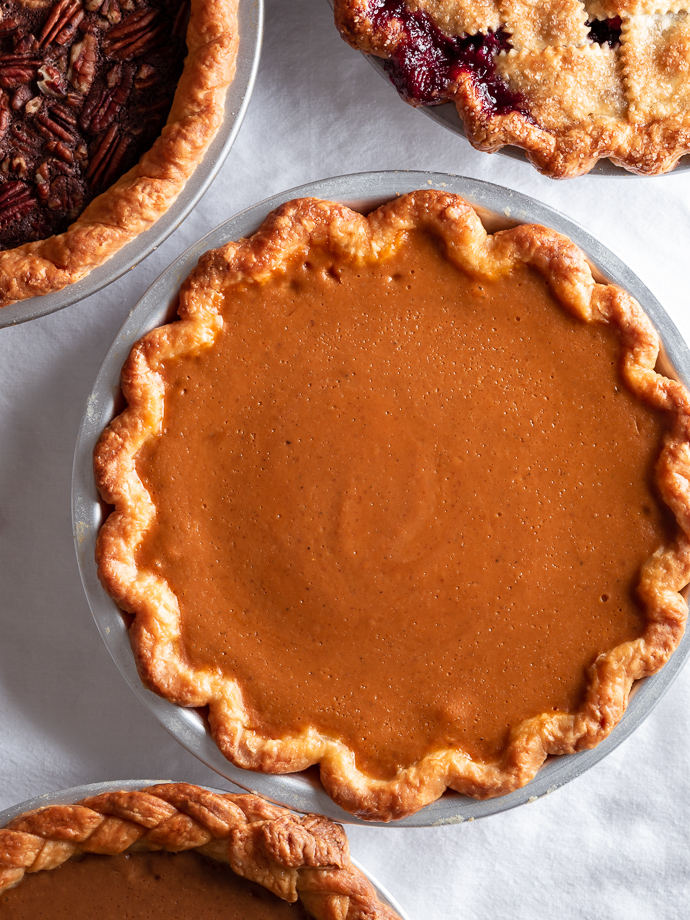
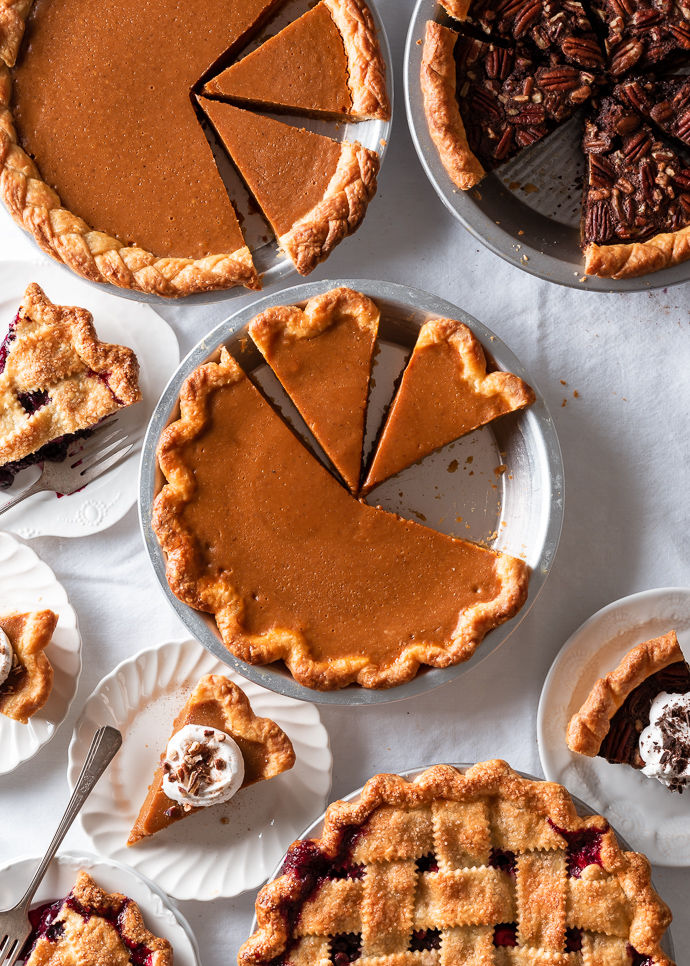
Perfect Pumpkin Pie
Smooth and creamy, perfect pumpkin pie. What begins as a classic, with a flaky, all-butter pie crust and flavorful pumpkin custard filling, is transformed with the addition of roasted sugar and warming chai spices, for what has become a holiday family favorite.

Perfect pumpkin pie
That’s right. This roasted sugar pumpkin pie is all kinds of perfect.
You won’t see a lot of “best” labels on this blog, but I’m making an exception for this beauty. Flaky all-butter crust. Decadent chai-spiced pumpkin filling. And a secret ingredient that takes things over the top.
Well, not so secret. I told you right there in the title – roasted sugar. It’s easy and delicious and perfectly at home in this otherwise mostly traditional pumpkin pie.
We usually make a gingersnap pumpkin pie for the holidays, a tried-and-true recipe that has a special place in our family lore. But with a press in gingersnap crust, it’s arguably more tart than pie.
A sweet and spicy ginger cookie crumb crust paired with pumpkin filling is another kind of perfect, but I decided we ought to have a classic pumpkin pie too.
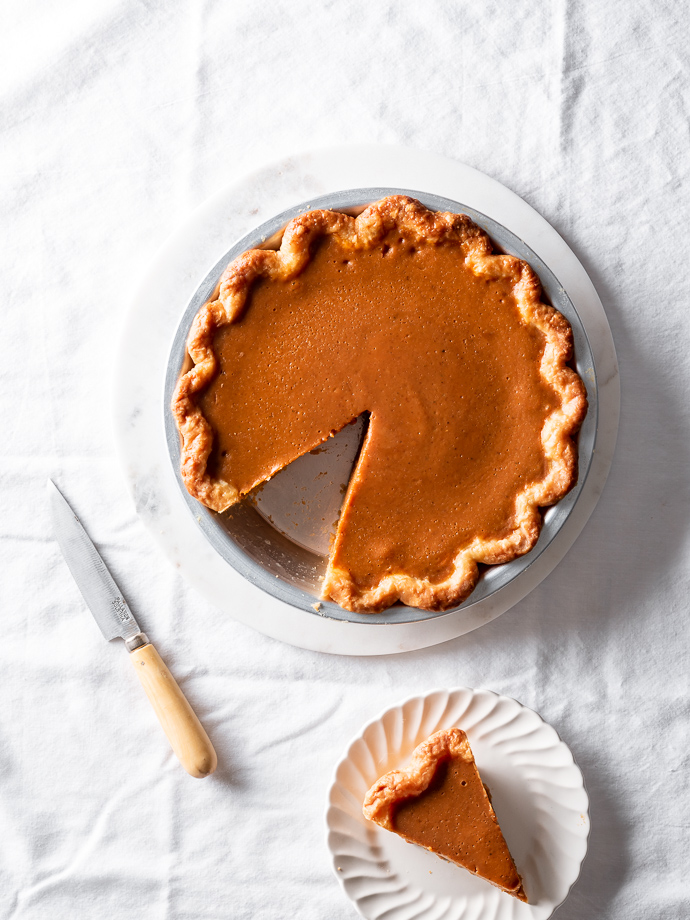
All too often, pumpkin pie crusts are, at best… boring. So if we’re going to go the traditional pie pastry route, it better be a darn good version. That means my go-to all-butter crust, with an emphasis on buttery, of course flaky, and (it should go without saying), properly cooked through.
Do you need to pre-bake the crust for pumpkin pie?
Many pumpkin pie recipes don’t require the pie crust to be blind baked first, but I’ve tested it both ways and think it’s essential. That is unless you’re a fan of soggy, uncooked pie bottom beneath your silky and delicious pumpkin filling.
I’m not.
So we’re going to take the extra step and blind bake the crust. I’ve recently adopted a new par baking method from Stella Parks’ BraveTart cookbook, which uses regular old granulated sugar as a pie weight. It works brilliantly.
Not only does the sugar easily fill every nook and cranny (so the pie dough stays in place and bakes evenly), the end result is roasted sugar – which imparts lovely caramel notes and complexity to your favorite sweets, and can be used 1:1 in place of traditional sugar.
And of course we’re going to add it to our pumpkin pie!

My pumpkin pie filling begins with canned pumpkin. Or you can use canned butternut squash. They will taste nearly the same. That’s because the Libby’s pumpkin we all grew up with is actually, horticulturally speaking, a variety of squash.
Or, you can also roast your own pumpkin or squash and blend it into homemade puree – just be mindful of the moisture levels. We want that thick, canned consistency.
Along with the pumpkin goes the roasted sugar, a few scoops of brown sugar to deepen the flavor, and a collection of heady, warming chai spices – ginger, cloves, cinnamon, cardamom, nutmeg, allspice, and black pepper.
The generous amount of spice is a lovely way to balance out what could otherwise become a cloyingly sweet pumpkin custard. Don’t get me wrong, this pumpkin pie is still incredibly rich, and we’ve yet to even add the sweetened condensed milk. For nostalgia’s sake, and all.
But that spiciness and the depth of flavor from the roasted sugar (and caramelizing the custard base prior to baking), tempers some of that sweetness and makes for an absolutely irresistible pumpkin pie that somehow manages to taste just like it did from my childhood, and so much better at the same time. Happy baking!!
Looking for more pumpkin desserts? Try these next:
- The best gingersnap pumpkin pie
- Gingersnap pumpkin pie bars
- Overnight pumpkin cinnamon rolls
- One bowl pumpkin gingerbread muffins
- Chocolate chip pumpkin bread (vegan)
If you make this pumpkin pie, be sure to tag me on Instagram with the hashtag #forkknifeswoon and leave a comment and rating below letting me know how you liked it! ★★★★★ Star ratings are especially helpful because they help others find my recipes too. xo, Laura
Print
Perfect Pumpkin Pie
- Prep Time: 2
- Cook Time: 2
- Total Time: 4 minutes
- Yield: 1 9-inch pie
- Category: Baking, Dessert
- Method: Baking
- Cuisine: American
- Diet: Vegetarian
Description
Perfect pumpkin pie. With a flaky, all-butter pie crust and flavorful pumpkin custard filling, this classic pumpkin pie is made all the more delicious with the addition of roasted sugar and warming chai spices. Sure to become a holiday family favorite!
Ingredients
for the all-butter pie crust:
- 1–1/4 cups all-purpose flour
- 1 Tbsp organic cane sugar
- 1/2 tsp kosher salt
- 1/2 cup (1 stick) unsalted butter, very cold
- 1/2 Tbsp apple cider vinegar
- 4–6 Tbsp ice water
- granulated sugar, for blind baking
for the pumpkin filling:
- 1 (15oz) can pumpkin puree ¹
- 2/3 cup roasted sugar ²
- 2 Tbsp light brown sugar, packed
- 1 tsp fresh ginger paste ³
- 1 tsp ground cinnamon
- 1/4 tsp ground cloves
- 1/4 tsp ground nutmeg
- 1/8 tsp ground allspice
- 1/8 tsp black pepper
- 1/8 tsp ground cardamom
- 1 (14oz) can sweetened condensed milk
- 2 large eggs, at room-temperature
- 1 large egg yolk, at room-temperature
- 1 tsp pure vanilla extract
- optional: egg wash (1 large egg plus 1 Tbsp whole milk or cream)
Instructions
for the all-butter pie crust:
- Cut the butter into quarter-inch cubes. Place the butter in the freezer for at least ten minutes or until ready to use.
- Pulse together the flour, sugar, and salt in a food processor, once or twice until just combined. Add the butter cubes to the flour mixture and pulse a few times until the butter is evenly distributed, with the largest butter bits about the size of large peas.
- Add the vinegar and ice water, pulsing once or twice between each tablespoon addition. The dough is ready when it appears crumbly, but will easily hold together when pinched between two fingers. It’s better to err on the side of a slightly wetter dough than too dry – you can always add a bit more flour when you’re rolling.
- Turn the dough out onto a clean, lightly floured work surface and shape into a round disk. Wrap the disk tightly in plastic wrap. Refrigerate the dough for at least 30 minutes prior to rolling it out. Waiting an hour or overnight is best. The pastry may be made in advance and stored a day in the refrigerator or – if wrapped very tightly in plastic wrap – about a month in the freezer.
Prepare the bottom crust:
- Remove your dough from the fridge. Wait about 5-10 minutes for the dough to warm slightly and become pliable.
- Place the dough in the center of a clean, lightly floured work surface. Using a rolling pin – I prefer to use a French (tapered) rolling pin – start in the center of the disk, and roll outwards, with firm but gentle pressure. Turn the dough and continue rolling towards the edges. As you work, don’t be afraid to sprinkle additional flour on top of the dough and underneath, as well as on the rolling pin to avoid sticking.
- Continue rolling until the dough is about 2-inches larger in diameter than your pie pan and about 1/8-inch thick. As the dough gets larger, be careful to apply even pressure with the rolling pin across the entire surface of the dough.
- Gently transfer the dough to your pie pan, being careful not to pull or tear the dough. Use your fingers to gently fit the dough against the sides and bottom of the pan, ensuring there are no air pockets. Using kitchen shears, trim the overhanging dough, leaving about an inch of excess (from the edge of the pan). Crimp the edges in your favorite pattern.
- Place the pie shell in the freezer for 20 minutes until chilled through, or in the refrigerator for at least an hour. It should be cold and firm enough that carefully pressing the aluminum foil into place won’t disturb your pie design.
- Alternatively, once the crust is frozen, wrap tightly in plastic wrap, and store until ready to use, about a month.
When ready to bake
- Preheat the oven to 350℉. Line a sheet pan with parchment paper. Set aside.
- Place the chilled pie crust on the prepared sheet pan and line with a large piece of aluminum foil, carefully and methodically pressing the foil against the bottom and sides of the pastry, and into any nooks and crannies in the design. Be sure all of the crust is covered (this may take two overlapping sheets of foil).
- Fill the foil-covered crust with granulated sugar, all the way up to the top edge. Bake for 50-60 minutes, until the crust is lightly golden and barely cooked through. Remove from the oven, wait until the foil/sugar is cool enough to handle, then transfer your par-baked crust to a wire baking rack to cool until ready to fill.
- Do not discard the roasted sugar. Carefully transfer it to an air-tight container (avoid getting any melted butter in it from the pastry) and use it 1:1 in your favorite baked goods (and in the pumpkin pie filling!).
Meanwhile, make the filling:
- Heat the pumpkin, roasted sugar, brown sugar, ginger, and spices in a large heavy-bottomed pot over medium-heat, until the mixture begins to sputter. Cook for 5 minutes, stirring regularly, until smooth and glossy.
- Remove from the heat and slowly stir in the condensed milk, whisking until completely combined. Whisk in the eggs and egg yolk, one at a time, whisking until completely combined after each addition. Stir in the vanilla.
- Pour the filling into the par-baked pie shell. Lightly brush the crust with an egg wash, if using.
- Bake for 30 minutes at 350℉, until the edges of the filling are just starting to set. Turn the oven down to 325℉, and bake for another 20-30 minutes, until the filling is mostly set (the center will still be slightly jiggly). Cover just the crust with aluminum foil or a pie crust shield, as needed, if the crust starts to brown too quickly. The filling may bubble and puff up slightly as it cooks – that’s okay, it will settle as it cools.
- Remove from the oven and let cool at room-temperature for 2-3 hours until completely set. The pie filling will continue cooking through residual heat.
- Transfer to the refrigerator to chill fully. Garnish with fresh whipped cream and serve chilled or at room-temperature. Best eaten the day of, but will keep for 2-3 days in the refrigerator.


Notes
¹ Canned pumpkin puree is best. I typically use Libby’s. You can also use canned butternut squash puree. If you decide to make your own, I’d suggest using a sugar pumpkin or honeynut butternut squash. Be sure to drain the puree well by placing it in a fine-mesh sieve set over a bowl in the refrigerator for several hours or overnight.
² May be substituted 1:1 with regular granulated or organic cane sugar.
³ If you prefer not to use fresh ginger, substitute 1/2 tsp ground ginger.
Made this for Thanksgiving yesterday. What a welcomed change to all the sugary sweet potato dishes so often served during the holidays. Followed recipe exactly using half-and-half instead of heavy cream. Don’t omit the fresh thyme.
So I love your original, Best Gingersnap Pumpkin Pie and it’s become a favorite standout for Thanksgiving. But now that I’ve tested this one, too, with the roasted sugar and chai, it’s a toss-up as to which one I’ll bake for Thanksgiving, and which one I’ll bake for Christmas!
Thanks, Laura!
Thanks so much, Abigail!! So happy to hear both pies have become part of your holiday traditions!
Hey can we use fresh pumpkin in this?
I haven’t tried using fresh pumpkin, but if you go that route, you’ll probably need to cook the pumpkin purée a little bit longer. Fresh pumpkin tends to have a lot more liquid than canned pumpkin, which can throw off the moisture levels of the filling. Hope that helps!
I SOOOO wanted to love this pie. The roasted sugar was a new fun thing to try. The texture of the pie is GREAT! The spices are a nice change ( i will add more as I love it VERY ‘spicy’) BUT…. it is WAY TOO SWEET! I did not add the whole can of condensed milk as it did seem to me it would be too sweet. And even with that is was still too sweet for me. I will try and play with it because everything else was great. I love the roasted sugar, just worried that less condensed milk might change the texture.
This is the perfect pumpkin pie, I love the chai spices!
Roasted sugar is a new one for me. I can’t wait to try it — both for my Thanksgiving pumpkin pies next week, as well as in regular baking.
And I’m with you on the crust. I hate those soggy ones. It’s WAY better to par-bake them in advance.
Your Thanksgiving table must be beautiful!
This sounds wonderful, I can’t wait to try it!
Thanks, Leanne! Hope you love it 🙂