Homemade Apple Hand Pies
A sweet and comforting recipe for homemade apple hand pies, with a buttery, flaky crust and spiced brown sugar apple cinnamon filling, these handheld apple turnovers are a favorite way to bake up freshly-picked apples. Perfect for fall baking!
Easy Apple Hand Pies
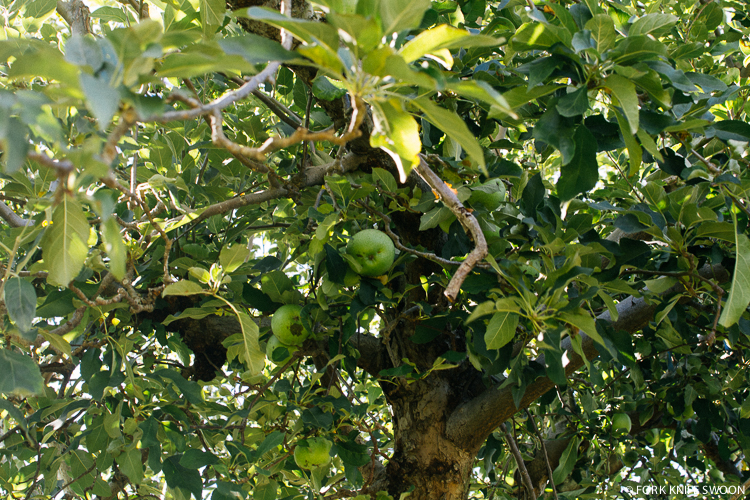
I had promised him a pie that perfect day in the apple orchard. We collected a small basket’s worth of apples – a few varieties for snacking, but mostly for baking. The Honey had to cut me off; we already had two crisper bins full of colorful apples waiting for us at home. My eyes, as always, were too big.
Apple pie was one of the very first desserts that I learned to bake as a teenager, carefully following the classic recipe – the page always marked with that red ribbon – from our smudged and fading copy of the original Joy of Cooking. Over time I could recite the ingredients from memory, and learned to adapt, adding a little more or less of this and that as needed for each pie. The flavors ingrained.
When we got back from Asheville, it was clear that Fall had settled in for good. Cashmere socks and piping hot tea seem continuously in order. Dreary days are brightened by the intoxicating aroma of fall baking and slow-braised soups and stews.
I’ve been adding apples to everything lately – baked into desserts, swirled into ice cream, tossed with cinnamon atop steamy oatmeal in the morning, roasted with butternut squash to create a savory soup… – the list goes on.
Instead of a traditional pie, I decided to make miniature hand pies; all the classic apple pie flavors – sweet apple, cinnamon, nutmeg and cloves – in convenient hand-held form.
Why You’ll Love These Apple Hand Pies
Hand pies, miniature apple pies, apple turnovers – whatever you call them, these little pastry pockets of apple goodness are irresistible!
They combine all the flavors and elements of classic apple pie – buttery, flaky pie crust, and brown sugar apple cinnamon filling – but they’re easy to make, easy to share, and perfect for fall and holiday baking.

The Ingredients You’ll Need for Apple Hand Pies
These miniature apple pies combine mostly pantry staples to create irresistible pastries that bely their simplicity. Here are the ingredients you’ll need to make them:
- pie pastry: this easy pie crust is made with flour, sugar, salt, butter, vegetable shortening, and ice water, and comes together quickly in a food processor.
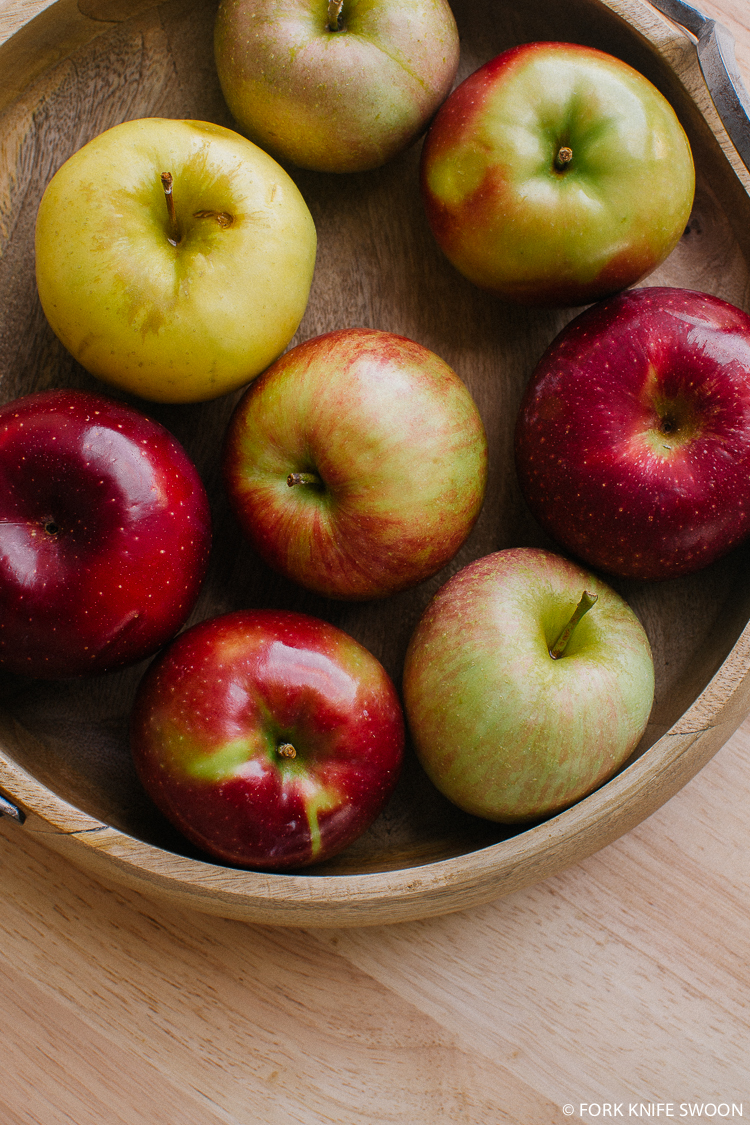
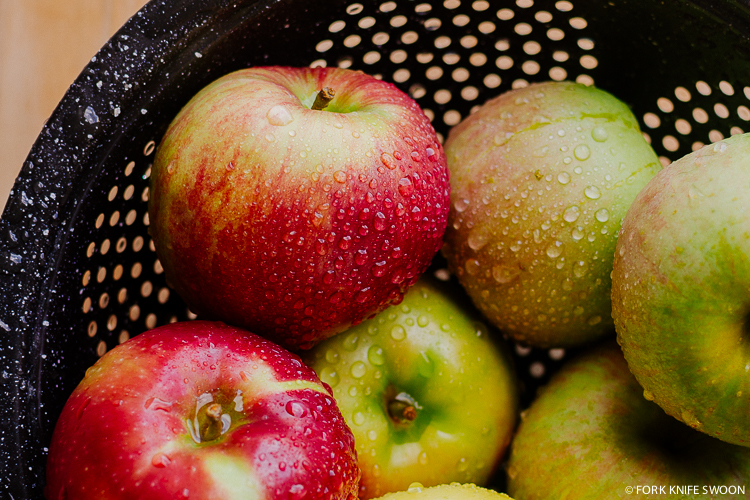
- apples: of course! I like to use a mix of firm, sweet-tart varieties such as Honeycrisp, Pink Lady, Fuji, or Braeburn.
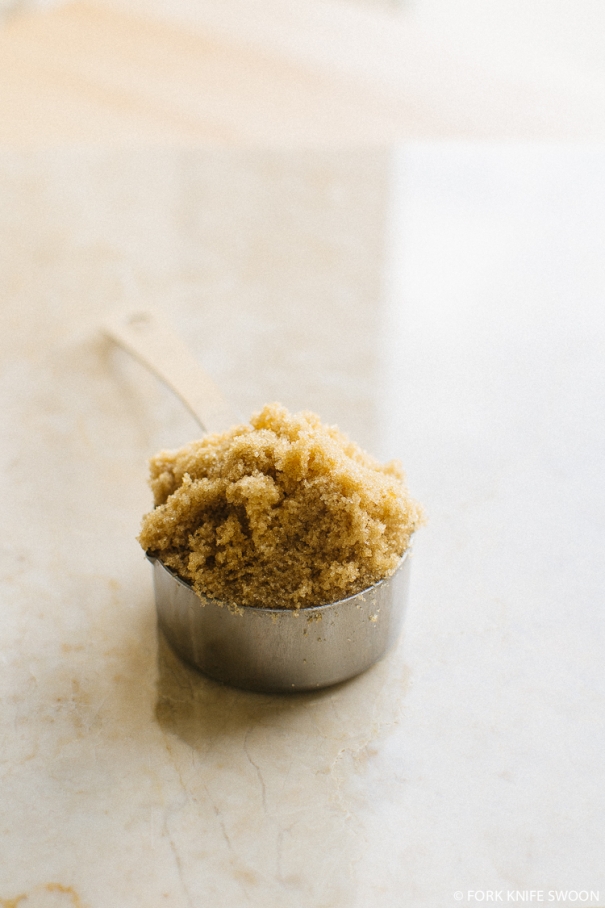
- brown sugar: adds sweetness and caramel notes.
- butter: for flavorfully cooking the apples before filling the pastry.
- cinnamon, nutmeg, and cloves: these cozy, warming spices are the perfect complement to the sweet apples.
Find all the exact measurements, detailed instructions, and a step-by-step video in the recipe card, below.
Apple Hand Pie Filling
These apple hand pies are one of my favorite ways to highlight one of my favorite Fall ingredients: sweet, in-season apples!
The apple pie filling is super simple. Diced apples are sautéed with butter, brown sugar, cinnamon, nutmeg, and cloves, then tucked into little pockets of pie dough. This initial cooking reduces some of the apple’s natural liquid, lightly caramelizes the brown sugar, and ensures the apples are tender in the finished tarts.
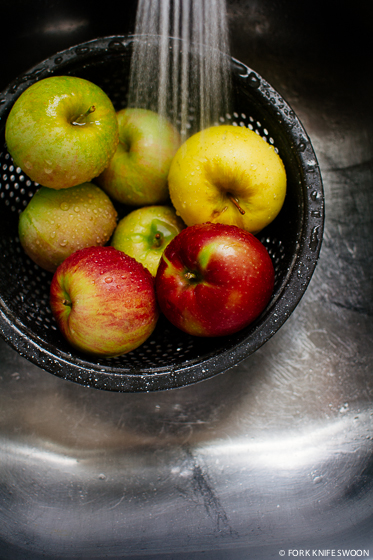
Look for a firm, sweet and tart variety of apple (a mix is even better), and for the best texture, be sure to peel your apples and dice them into small, bite sized pieces.

The Best Pie Crust for Mini Apple Pies
These apple hand pies begin with a flaky, buttery pie crust. While I typically use a tried-and-true all-butter pastry for my pies, the dough that I used in this recipe is the “Good For Almost Everything Pie Dough” from Dorie Greenspan’s wonderful baking book – Baking: From my home to yours. It’s a mix of butter – for flavor – and vegetable shortening – which makes the dough very easy to work with.
It’s a great, all-around, flexible dough, that holds its shape through baking and is lovely in this recipe (as well as any number of other pies and tarts). If you already have your own go-to pie dough, feel free to use that here, but if not, I highly recommend this version.
I make mine with a food processor, which works quickly and keeps the butter and shortening cold (key for flaky pastry), but you can also go the traditional route and use a pastry blender.
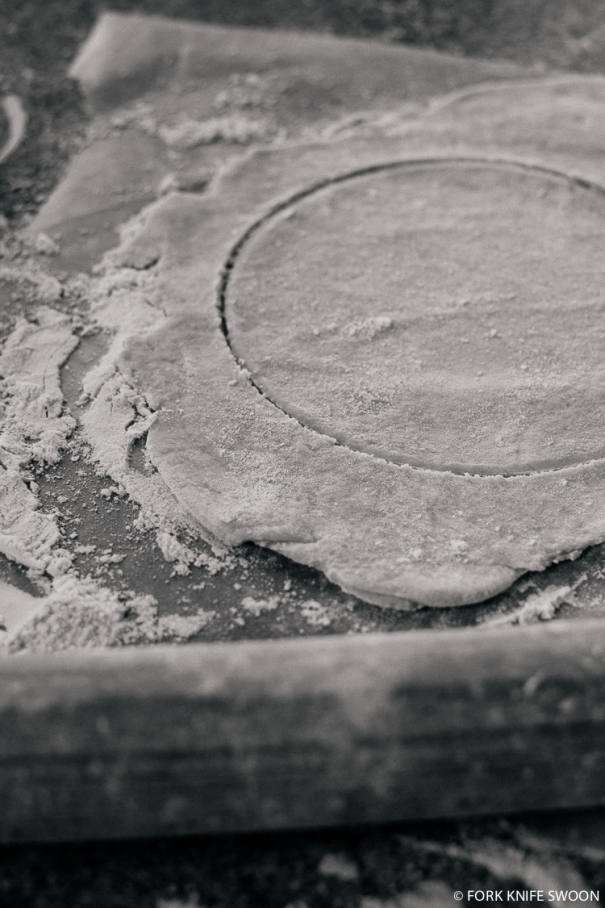
Note: The dough needs to rest for at least an hour in the refrigerator before you roll out your crusts, which allows the gluten in the flour time to relax and the butter and shortening to fully chill and firm up. This reduces potential for dough shrinkage or sticking, and makes for super buttery, tender, flaky pie crust.
How to Make Apple Hand Pies
While there are several steps to making these apple turnovers, once you get organized, they’re actually quite simple. There are three main components to tackle: making the pie dough, cooking the apple filling, and assembling the mini pies. Then, bake and voila!
- Make the pie pastry: Use a food processor or pastry blender to combine flour, sugar, and salt with very cold butter and shortening until they form a chunky crumbly mixture. Add ice water a bit at a time and pulse/mix until the dough comes together. We’ll divide the dough into two disks so it’s easier to work with, and let it rest in the refrigerator.
- Cook the apple filling: When you’re ready to make the pies, saute the apples in a large skillet until the butter and brown sugar are melted and the apples are tender.
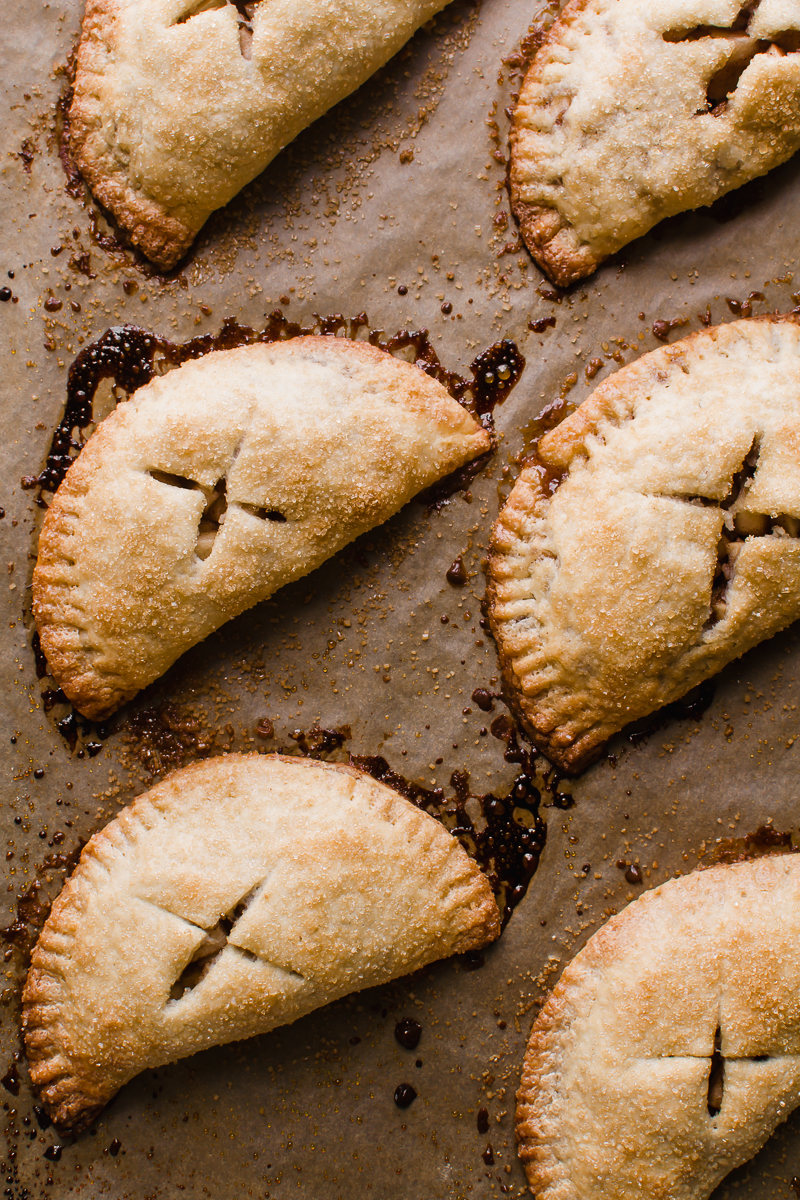
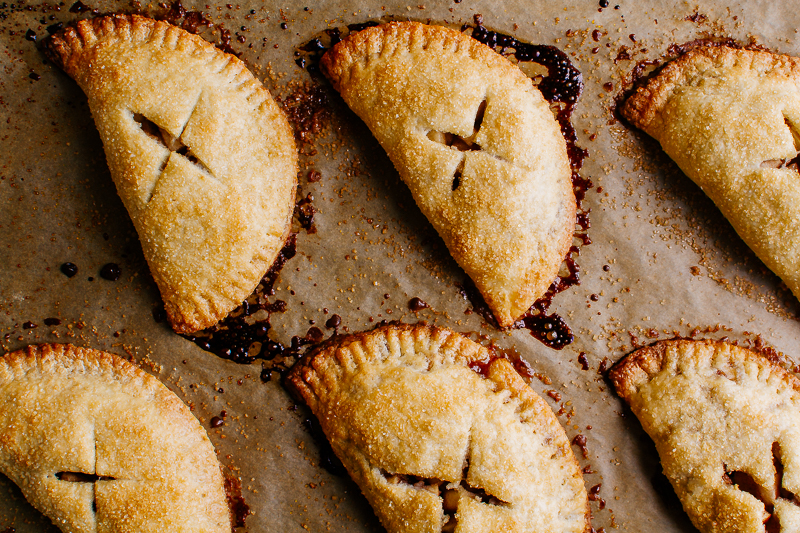
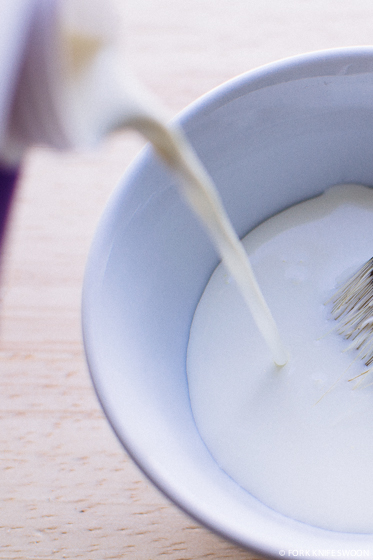
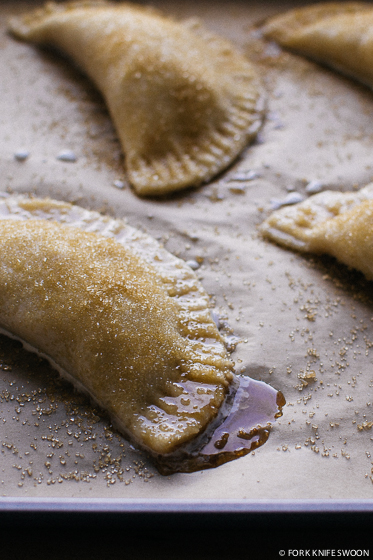
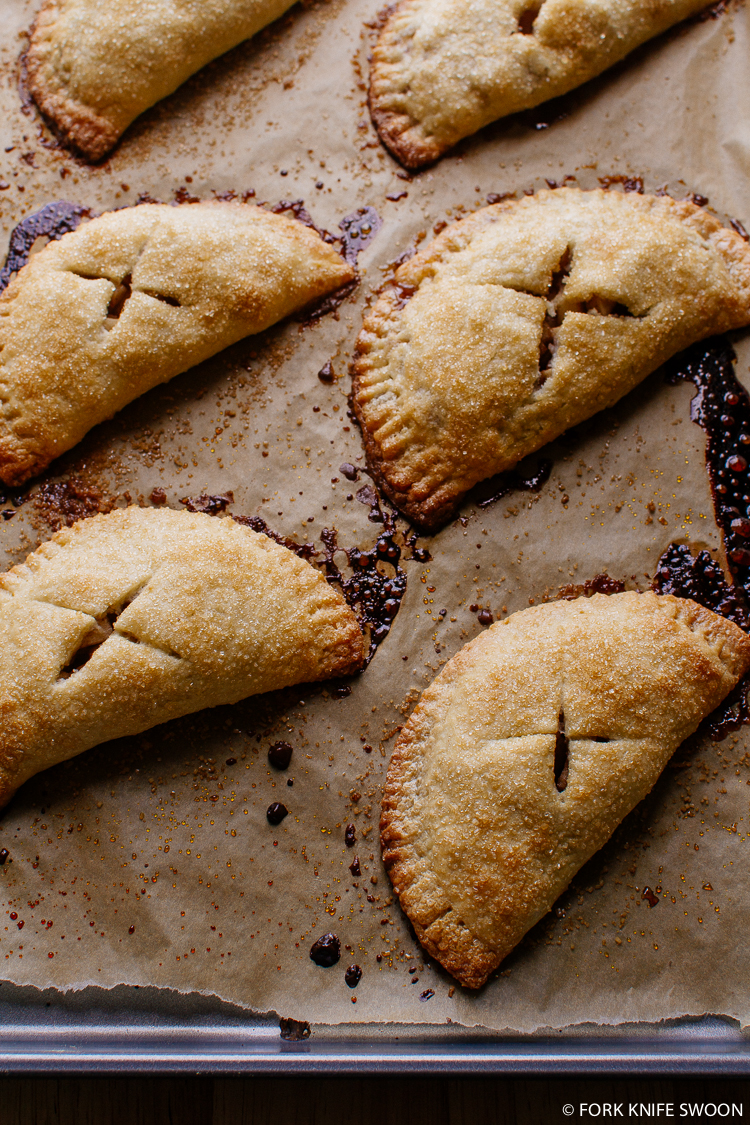
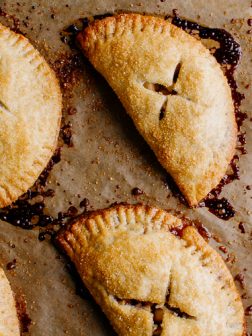
- Assemble the apple hand pies: Next, working with half the dough, the chilled and rested pastry is rolled out into 5-inch circles. The apple cinnamon filling is layered in the center, and the edges are folded over to make a turnover. Crimp the edges with a fork, and for a golden, bakery style shine, brush the pastry with a milk or egg wash. You can also top with sanding sugar or simply leave the tops plain.
- Bake until golden and the filling begins to bubble. Enjoy!!
Don’t worry if your apple turnovers aren’t exactly round or the edges are wonky or uneven. As long as the pastry folds around the edges and holds the filling in place, you’re fine. I promise you, when the pastries emerge from the oven, golden and flaky and filled with delicious, caramelized apple goodness, no one will mind a little asymmetry.
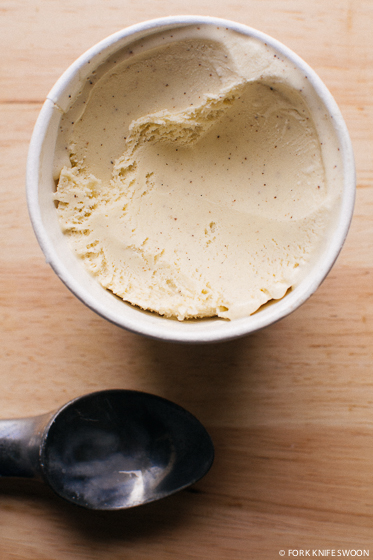
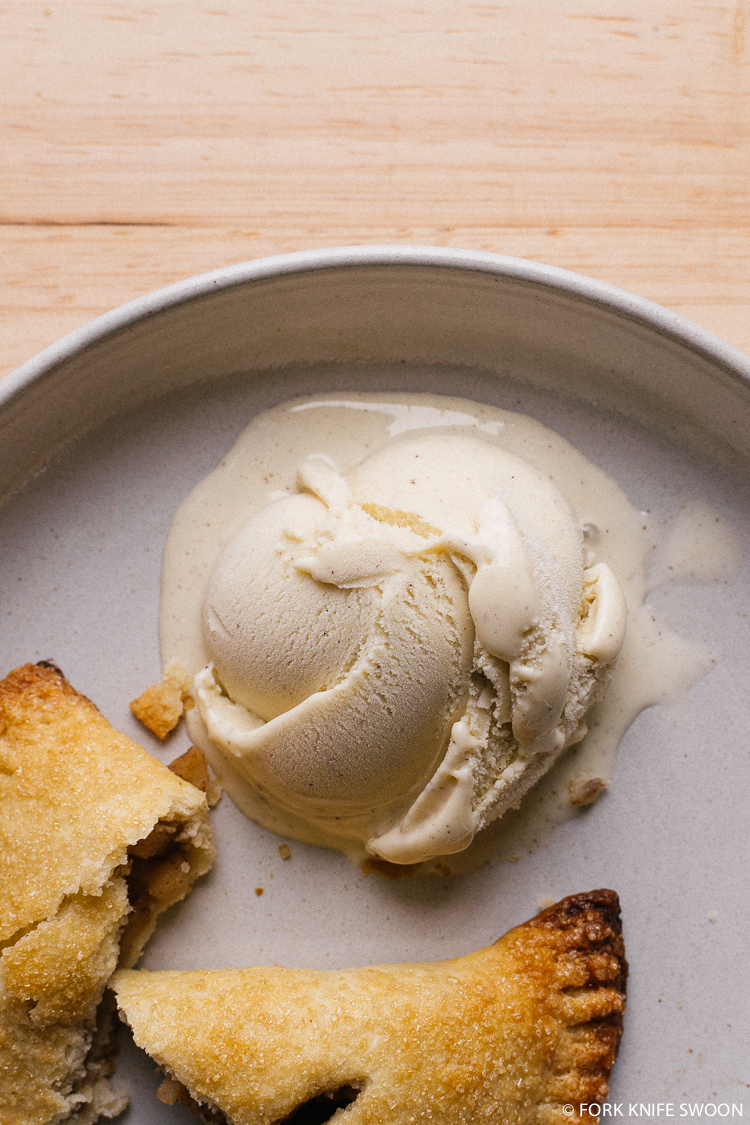
Also key? Serving with a dusting of powdered sugar or creamy vanilla ice cream on top. Happy baking!!
Homemade Apple Hand Pie FAQs
Nope. The shortening in the pie crust is recommended because it makes the pastry super flaky, easy to work with, and helps the pies hold their shape while baking. However, you can use all butter or another favorite pie crust recipe instead.
You want a crisp, sweet and tart apple that will hold up during baking. Use your favorite variety such as Honeycrisp, Braeburn, Pink Lady, Northern Spy, Jonagold or even better, a combination.
For the best texture, it’s important to cook the apple filling before forming the pies. This ensures that the apples are soft and tender, and reduces some of their natural moisture.
Yes. You can make and assemble the hand pies, then freeze just before baking. Bake from frozen, and add a few minutes to the baking time.
Making the pie crust in advance is a major shortcut and lets you have homemade pie whenever the craving strikes! You can make it up to 2 days ahead of time and keep it wrapped tightly in plastic in the refrigerator or for up to 3 months in the freezer. When you’re ready to use the dough, let it thaw in the refrigerator overnight.
These apple turnovers are best warm from the oven the day they’re made. However, the pies can be stored at room temperature for the first day, then covered in the refrigerator for up to 2 days (after which the pastry crust may start to get soggy). You can also freeze them.
Wait until the pies are completely cooled, then individually wrap the pies tightly in plastic wrap, and freeze in a freezer storage bag for up to 2 months.
Other Easy and Delicious Apple Recipes to Bake This Season:
- Classic apple pie
- Baked apple donuts
- Apple cider cinnamon rolls
- Cinnamon streusel apple muffins
- Caramel apple crumble bars
If you make these apple hand pies, be sure to leave a comment and rating below letting me know how you liked them! ★★★★★ Star ratings are especially helpful because they help others find my recipes too. xo, Laura
Homemade Apple Hand Pies
- Prep Time: 70 mins
- Cook Time: 35 mins
- Total Time: 1 hour 45 mins
- Yield: 12 Hand Pies
- Category: Baking, Dessert
- Method: Baking
- Cuisine: American
- Diet: Vegetarian
Description
A sweet and comforting recipe for homemade apple hand pies, with a buttery crust and spiced brown sugar apple filling, these handheld apple turnovers are a favorite way to bake up freshly-picked Fall apples.
Ingredients
Pie Pastry
- 3 cups all-purpose flour
- 1/4 cup granulated sugar
- 1–1/2 tsp fine sea salt
- 1–1/4 cups (2–1/2 sticks) unsalted butter, very cold, cubed
- 1/3 cup all-vegetable shortening, very cold or frozen, cut into small pieces
- 6–7 Tbsp ice water
Apple Pie Filling
- 5 cups diced apples, peeled
- 2 Tbsp unsalted butter
- 1/2 cup (packed) brown sugar
- 1 tsp ground cinnamon
- 1/4 tsp ground nutmeg
- 1/4 tsp ground cloves
For Topping
- 1/3–1/2 cup heavy whipping cream
- demerara sugar (or other coarse sanding sugar)
Instructions
Make the pie pastry
- In a food processor fitted with a metal blade, pulse together the flour, sugar and salt until well-combined. Add the butter and shortening to the flour mixture and pulse a few times until the butter and shortening pieces are evenly dispersed, with the largest pieces about the size of large peas. Be careful not to over-mix.
- Add the ice water, a tablespoon or two at a time, and pulse to combine, until the dough is evenly moistened. Pinch a bit of dough together between two fingers to test – the dough should stick together. If the dough seems dry, add a few more teaspoons of water and pulse again.
- Transfer the pastry to a clean, well-floured work surface, and divide the dough in half. Gather each half of dough into a ball, then flatten into a round, disk, and wrap tightly in plastic wrap. Refrigerate for at least an hour before you begin to roll out the dough.
Make the apple pie filling
- Heat a large skillet over medium-heat. Add the diced apples, butter, brown sugar and spices to the pan and stir to combine.
- Cook until the butter is melted and the apples are just soft, but not mushy, about 2 minutes. Remove from the heat, and transfer the apple filling to a mixing bowl to cool. Set aside and let come to room temperature.
To bake the pies
- Preheat the oven to 375 ℉. Line two sheet pans with parchment paper. Set aside.
- Remove one of the dough disks from the refrigerator. Roll the dough out on to a generously-floured piece of parchment paper, until it is about 1/8-inch thick.
- Using a 5-inch-diameter cookie cutter or saucer (my preferred method), cut out six circles. Re-roll the dough as necessary to achieve all six.
- Lay the pastry circles on one of the sheet pans and top with half of the apple mixture, being sure to reserve as much of the apple liquid as possible. Adding too much liquid to the pies will get messy, quickly.
- Fold the dough circles in half, and use your fingers to gently press the edges together. Using the back of a fork, gently press down to create a fluted seal along the edge.
- Lightly brush the top of each pastry with the cream, and sprinkle generously with the demerara sugar. Cut a small x-shaped slit in the top of each pie, and repeat these steps with the second dough disk.
- Bake for 20-30 minutes, until the pies are golden brown and cooked through. Let cool for 10 minutes on a baking rack. Serve warm with a scoop of vanilla ice cream. Enjoy!!


Hi! I was wondering how I could make these with crispier apples in the filling – I’m not super fond of soft cooked apples, and really like the crunch of raw apples. Thanks in advance!
Hi, Alex!! So that’s an unusual question! I would try simply not cooking the apples before filling the pies. I would still melt the butter and brown sugar and just stir in the fresh apples once it’s off the heat. Hope that helps and please let me know if you try it 🙂
These looked so good, and had such great reviews, I decided to make them – A Lot of them for a Brunswick Stew event. I ended up making about 100 – the recipe completely threw me off with the butter – so it took me way longer, as I had to go back and fix the butter issue. They were really good – and have received many good comments from customers. The apples and crust are not sweet – exactly what I was looking for!!! I ended up with many extra apples – so I’m making a pie to freeze. Next time I’m using a tortilla press instead of rolling individually. Wish me luck!! 🙂
Wow, that’s an impressive number of pies! So happy my recipe could be a delicious part of your event. Thank you so much, Cindi!!
This. Is. A.M.A.Z.I.N.G!
Thank you for sharing.
The crust is delicious and texture was the right crisp for a pie shell and the filling had the perfect texture, not too soft or too hard.
We froze it and baked it half of them the next day. It was so good!
We used yellow eggs yolks as the wash as family tradition and came out shiny golden.
Do you have other filling recipes, i.e. blueberry, cherry or other fruit filling? Thanks, again.
Thank you so much, Susan!! So happy to hear these were such a hit! You can use many different fruits for the filling (or even jam). These ginger pear pies are a favorite for this time of year too: https://www.forkknifeswoon.com/ginger-pear-hand-pies/
Thank you, Laura. Will try those one day. Last night, I made some unbaked hand pies and laid them on a baking tray to freeze it for 1-2 hours. Then I continued to freeze them but in a container. When I am ready to have them like this morning (Yes! for breakfast), I place a few on a baking tray and bake it at 425 for the first 15 minutes, then lower the temp to 350 to bake for another 10-15 minutes. The hand pies was incredibly good! Thanks again for sharing this great recipe!
So happy the pies are a hit! And Thanks so much for this “save for later” tip!! 🙂
Thanks for sharing apple pie recipe!
And the vanilla ice cream touch in the end is awesome.
Thanks so much, Anjali!! 🙂
This is my second time making this recipe and it is just delicious. Passed on the recipe both times. Did make rhubarb pies also and they were a hit! I made a rhubarb sauce and used that so they wouldn’t be too juicy. Thank you!!
Thank you so much, Michelle!! And thank you for sharing the recipe!! 🙂
I am confused about the butter. Do I add 1 cup butter or 1 1/2 cups butter? Two sticks is 1 one cup but in the parentheses it says 1 1/2 cups.
Hi Suzanne! Yes, there was a mistake in the ingredients list – it should be 2-1/2 sticks of butter or 1-1/4 cups or 10 oz. Sorry about the confusion!
Love these. A pinch of cardamom adds a nice note if you’re looking to add a bit of mystery.
Hi Laura, Someone mentioned she used all butter for the dough, no shortening . Does this work? Also, should we add some flour in the apple mixture in order not to make a mess with the liquid?
You can use butter, I use all butter. Its a bit more tricky to work with though. And I add a tbsp of flour to my sugar mixture, and sometimes a bit more depending on the apples.
The pie dough was really great to work with, and goes in my book. Much more pliable than my usual recipe, but also more fiddly. The filling was good too, a very “American” taste due to the cinnamon and brown sugar. It brought me back to my exchange year, 28 years ago. I made tiny little pies that looked like English mince pies. I added a teaspoon of corn starch to the juice, and put it right back in with the apple pieces. This solved the mess problem. Next time I will try to make it more Scandinavian style, with less (white) sugar, no spices, maybe a little lemon juice if the apples are very sweet. Oh! And come spring, these would be great with rhubarb!
Love this! I used all butter since I didn’t have shortening, and the crust turned out great. They are delicious and fall-like!
Thanks, Cathy!! Glad to hear the all-butter version worked just as well!
Made this for a group of friends and they all loved it! Some ate it with ice cream, and others just used their hands. The crust was a huge hit, so this is very much a keeper! Thanks also for the quick answer on whether to defrost before baking.
So happy everyone loved these! They’re such a favorite around here 🙂
Made these today. Excellent. Will definitely make these again!
So happy to hear that, thanks, Melissa!!
Hello! I am just a bit confused about the instructions, where it says “Lay the pastry circles on one of the sheet pans …. being sure to RESERVE AS MUCH LIQUID AS POSSIBLE. Adding too much liquid to the pies will get messy”. Does that mean I am reserving as much liquid OUT of the pie? Or what am I reserving it for? Thanks.
Hi Patsy! Sorry for the confusion – yes, you’ll want to keep as much liquid as you can out of the pie filling. Otherwise they’ll leak out quite a bit when baking. It’s yummy stuff, and you can reserve the liquid for something else or discard (you won’t need it again in this recipe). Hope that helps! Enjoy! 🙂
The pastry can be made without using a food processor too right? And is there a big difference if I don’t brush the cream on top before baking?
Hi Sarah! Yes, absolutely. It will take a little bit longer, but you can absolutely use a pastry blender, or a large fork, or even your fingers in a pinch. Just be sure to work quickly so that the dough stays cold. The cream gives the pies a nice shiny, golden crust, but you can omit if you’d like to. Enjoy!
Can these be frozen? If so, how do you defrost them so that the dough won’t be wet? Thank you.
Hi Maureen! You’ll actually want to bake them from frozen for the best results. Assemble the pies, wrap tightly before freezing, then brush with the cream before baking. Hope that helps! 🙂
when baking from frozen, should they be defrosted first?
Nope! Just bake from frozen.
I always put some scoops of ice cream on the top!
I bake. A. LOT.
My kids and extended family tell me I should go on a baking show. (I’m not quite that good but good enough.) My great grandmother gave me a rolling pin and pie plate for my 12th birthday and I was taught the art of making pie dough. Every single recipe I’ve ever tried uses a ratio of flour:fat with less fat than this one. They’re all wrong. For hand pies, this is far and away the best recipe I’ve ever used. I worked it with my hands a little more than I typically do (never a food processor), and I split the dough into 2 separate disks for chilling. I baked on a parchment lined HIGH QUALITY aluminum pan at 350*. Even my brother, who has eaten a lot of my pies, announced, “this is money, right here.”
It will go to the front of my recipe book, for sure. DELICIOUS.
Thank you for saving my thanksgiving. I made this pie with apples we dried at the end of summer. I couldnt believe I made this from scratch. My mother in law can’t wait to test these pies. The crust was soon good. Thanks again for sharing
Made these today and they are out of this world! The dough is light, flaky and flavorful. Apples were perfect.
made the mistake of building them before apples were fully cooled so tore the pastry a bit. Next time I will TRY to be more patient. Thanks for sharing!
Hello! I just wanted to say, that this recipe turned out great! The dough is awesomely delicious – after trying and buying a dozen different tasteless doughy crusts, this one finally is a winner! It’s super tasty, enough so that my husband was actually eating some of it raw! 🙂
I threw in some cinnamon, clove and allspice into the dough to spice it up a little and mixed it by hand with a pastry cutter since I don’t have a large enough food processor. In addition to the apple filling, I also used some blueberry and cherry pie filling I canned last year. I noticed the dough was a tad crumbly, next time I’ll add a bit more water as mentioned in the recipe, and perhaps even chill the dough overnight like I do for my sugar cookie recipe.
At any rate, these were awesome and it’s definitely a recipe I’ll be making again. Thank you so much for sharing!!